Updated: 22 Apr 2026, 15:25
Intro to full-stack web development with Flask
Table of contents
- Learning objectives
- 1. Prerequisites
- 2. Launch the web server with a minimal Flask application
- 3. Initialize the SQLite database
- 4. Query the database to populate HTML-based Jinja templates
- 5. Bonus: deliver JSON instead of HTML to the web server
- 6. Apply CSS to style the user interface
- 7. The end result
- Optional: ideas to extend functionality
The code presented in this notebook is available on the
fswd-apprepository.First,
git clonethe repository.Next, run
git switch introto switch to theintrobranch of the repository.The exemplary code shows the result at the end of this notebook.
Learning objectives
With this notebook, we tour key elements of full-stack web development, namely:
- How to launch a web server
- How to interact with a database
- How to write business logic
- How to create a user interface (UI)
- How to style a web-based UI
We use a Flask-centered tech stack to accomplish these tasks:

Our tech stack
- Flask built-in development web server, via its Werkzeug dependency (not fit for purpose for productive use)
- SQLite database, which comes bundled with Python
- Business logic written in Python, utilizing Flask functionality and Flask design concepts
- UI created as Jinja templates: processed by the Jinja templating engine, served as HTML pages via the web server
- Styling of the HTML pages with hand-written CSS, or cascading style sheets
What’s out of scope
Full-stack web development includes many more disciplines that we won’t discuss here. To mention a few:
- Testing
- Writing (automated) tests such as unit tests, integration tests, or end-to-end tests with tools like Pytest
- Concepts like error handling or graceful degradation, which would allow the application not to terminate if we don’t follow the happy path
- Automation
- Putting your code in (git-based) version control
- Setting up a continuous integration / continuous deployment pipeline (CI/CD), e.g., by leveraging GitHub Actions
- Operations
- Setting up, monitoring, and optimizing (Cloud-based) infrastructure to deploy and run the application, e.g., based on Microsoft Azure, Amazon Web Services, Alibaba Cloud
- Modularization
- Design patterns like Backends-for-Frontends (BFF) to separate varied frontends (e.g., web, iOS, Android) from common backend (micro-)services
- Refactoring the code base for better maintainability, portability, stability, etc.
- User experience
- Using tools like Figma or Sketch to prototype and iterate graphical user interfaces
- Responsive user interfaces that fluently adapt to user screens such as desktop or mobile
- Collaboration
- Complementary technology, e.g.:
- Production-grade web servers such as nginx
- ORM (object-relational mapping) frameworks such as SQLAlchemy
- Flask extensions
- Layouting and styling libraries such as Bootstrap
I recommend you follow the provided links to get at least an idea about the terms and technologies mentioned above.
1. Prerequisites
I assume that you have done the following:
- A project folder exists such as
C:\Users\me\projects\webapp\. - Flask is installed, either within a Python Virtual Environment that resides within your project folder (preferred) or as part of your global Python installation (avoid if possible).
Your project folder might look like this (Windows example, macOS slightly different):
┬ webapp/
├─┬ venv/
│ ├─┬ Lib/
│ │ └─┬ site-packages/
│ │   ├── flask/
│ │   ├── jinja2/
│ │   └── …
│ └ …
├── .gitignore
├── README.md
└── …
You might want to follow this tutorial on setting up Python and Visual Studio Code to set up everything as intended.
As a beginner to Python, you might want to consult this Python primer to learn about some basic concepts of the language.
2. Launch the web server with a minimal Flask application
2.1. Flask-powered “Hello, World!” web app
In your project folder (e.g., 📁C:\Users\me\projects\webapp\), create a new file 📄app.py:
from flask import Flask

app = Flask(__name__)

@app.route('/')
def index():
    return 'Hello, World!'
@app.route() is a Python decorator. A decorator takes a function as input and extends its behavior with additional functionality.
Having said that, you don’t need to understand the decorator design pattern to use its most common use in Flask: with @app.route() you specify the URL route for which the following function will be executed.
Next, extend 📄app.py with the following code:
@app.route('/lists/')
def lists():
    return 'Todo: implement business logic to show all to-do lists'

@app.route('/lists/<int:id>')
def list(id):
    return 'Todo: implement business logic to show all to-dos of a particular list'
With this code, we define two additional routes:
/lists/will pull all to-do lists from the database/lists/<int:id>will pull all to-dos that belong to a particular list ID. Notice the dynamic path routing syntax: variable parts are denoted with< ... >, and<int:id>specifies we expect variableidto be of typeint(i.e., a whole number).
We are going to build out the functionality later on.
The function definition
list()shadows the Python built-in `list’ data type.This doesn’t matter in this particular example, but should be avoided whenever possible. Here, I chose shadowing to make you aware of the shadowing rule in Python ;).
2.2. Run the web app with the Flask built-in development web server
Now it’s time to run this application. For that, we spin up the Flask built-in development web server and provide it the 📄app.py file we just created. Open a terminal session in your project folder:
flask run --reload
flask run --reloadwill start the Flask built-in web server with live reload enabled: after changing your app (i.e., change some code and save the file), you don’t need to stop and start the web server to get the updated behavior.- We called the file
📄app.pyand instantiated the Flask object asapp, which are the default Flask values for both. Therefore, we don’t need to provide this information to theflask runshell command. Head over to Flask docs to learn more about the Flask command-line interface (CLI).
Open a browser at 127.0.0.1:5000: You should be greeted with a simple Hello, World! message. Now, visit 127.0.0.1:5000/lists/, and next 127.0.0.1:5000/not_implemented/. Head back to the active terminal. It should read something like this:
(venv) C:\Users\me\projects\webapp> flask run --reload
* Debug mode: off
WARNING: This is a development server. Do not use it in a production deployment. Use a production WSGI server instead.
* Running on http://127.0.0.1:5000
Press CTRL+C to quit
* Restarting with stat
127.0.0.1 - - [dd/mmm/yyyy hh:mm:ss] "GET / HTTP/1.1" 200 -
127.0.0.1 - - [dd/mmm/yyyy hh:mm:ss] "GET /lists/ HTTP/1.1" 200 -
127.0.0.1 - - [dd/mmm/yyyy hh:mm:ss] "GET /not_implemented/ HTTP/1.1" 404 -
The web server catches any HTTP request posted to http://127.0.0.1:5000 (such as the /lists/ request) and hands it over to the Flask-based application we’ve just written.
If port
5000is already used on your computer, let the Flask web server listen to another port, e.g., port5001like so:flask run --port 5001 --reload
In our current business logic (e.g., def lists(): ...) we do not provide any formatting or HTML template, we just return a string. If you inspect the output (press Shift+Ctrl+I / ⌥+⌘+I from the browser window to open up the Inspector), you will notice a very basic HTML page has been rendered (converting the string to valid HTML happens in the background for you, courtesy of your browser):
<html>
    <head></head>
    <body>Todo: implement business logic to show all to-do lists</body>
</html>
If we submit an invalid URL like http://127.0.0.1:5000/not_implemented/, the web server will return a 404 response code, just as expected.
3. Initialize the SQLite database
The standard Python installation includes the sqlite3 module, which gives us easy access to the SQLite SQL database engine. For a small project, its features and performance are sufficient - no need to install and run a more capable database server like PostgreSQL.
3.1. The data model
Before interacting with the database CRUD-style, we need to initialize it first, i.e., create some database tables. We’re using the following data model:
%%{init: {
  "theme": "neutral"
}}%%
erDiagram
	todo {
		int id PK
		boolean complete
		string description
	}
	todo_list {
		int todo_id FK
		int list_id FK
	}
	list {
		int id PK
		string name
	}
	todo ||--o{ todo_list : "included in zero to many lists"
	list ||--o{ todo_list : "holds zero to many todos"
With this data model, we can manage to-dos, and every single to-do may be organized in one or more lists for better organization.
The following SQL statement, once executed by SQLite, will create these tables. Create a folder 📁sql/, then a file 📄create_tables.sql with the following content:
CREATE TABLE todo (
    id INTEGER PRIMARY KEY AUTOINCREMENT,
    complete BOOLEAN DEFAULT FALSE,
    description TEXT NOT NULL
);
CREATE TABLE list (
    id INTEGER PRIMARY KEY AUTOINCREMENT,
    name TEXT NOT NULL
);
CREATE TABLE todo_list (
    todo_id INTEGER,
    list_id INTEGER,
    PRIMARY KEY (todo_id, list_id),
    FOREIGN KEY (todo_id) REFERENCES todo (id) ON DELETE CASCADE,
    FOREIGN KEY (list_id) REFERENCES list (id) ON DELETE CASCADE
);
CREATE TABLEis the SQL command to create a table.- With the
ON DELETE CASCADEcommands, we tell SQLite to automatically delete any row fromtodo_listthat references a to-do or list ID if that particular origin ID is deleted. Without this command, we would need to do this sort of housekeeping manually to maintain referential integrity.
We could also specify
ON UPDATE CASCADEwhen defining the foreign key: this would tell SQLite to update the foreign key if the corresponding primary key is updated. For example, if theidvalue on tabletodo(the primary key) changed from1to101:UPDATE todo SET id = 101 WHERE id = 1;… SQLite would update all corresponding values of
todo_idon tabletodo_list(the foreign key) from1to101automatically for us. The SQL statement to enable this behavior would read:CREATE TABLE todo_list ( todo_id INTEGER, list_id INTEGER, PRIMARY KEY (todo_id, list_id), FOREIGN KEY (todo_id) REFERENCES todo (id) ON UPDATE CASCADE ON DELETE CASCADE, FOREIGN KEY (list_id) REFERENCES list (id) ON UPDATE CASCADE ON DELETE CASCADE );Since we don’t intend to update IDs within our code, we leave this out, though.
It is good practice to provide a second SQL statement which will delete the data model from your database, if needed. To this end, create a file 📄drop_tables.sql with the following content:
BEGIN TRANSACTION;
DROP TABLE IF EXISTS todo_list;
DROP TABLE IF EXISTS list;
DROP TABLE IF EXISTS todo;
COMMIT;
To reduce potential errors it is usually a good idea to DROP TABLE containing foreign keys first. This is why we DROP TABLE in reverse order of the CREATE TABLE statements.
If you need a refresher on SQL syntax or an introduction to the specific SQLite flavor, consult the SQLite documentation.
3.2. Database handling
In your project folder next to 📄app.py, create a new file 📄db.py:
import click
import os
import sqlite3
from flask import current_app, g

def get_db_con(pragma_foreign_keys = True):
    if 'db_con' not in g:
        g.db_con = sqlite3.connect(
            current_app.config['DATABASE'],
            detect_types=sqlite3.PARSE_DECLTYPES
        )
        g.db_con.row_factory = sqlite3.Row
        if pragma_foreign_keys:
            g.db_con.execute('PRAGMA foreign_keys = ON;')
    return g.db_con

def close_db_con(e=None):
    db_con = g.pop('db_con', None)
    if db_con is not None:
        db_con.close()
- With this code, we are now able to:
def get_db_con(): ...Connect to the database engine.def close_db_con(): ...Close the database connection.
- You will notice the special Flask objects
current_appandg. Consult the Flask documentation or work through the Flask tutorial to learn more. - With
PRAGMA foreign_keys = ON;we tell SQLite to enforce foreign key constraints, which by default is turned off.
Not enforcing foreign key constraints is often a good thing, since SQLite will throw fewer errors during runtime. However, it comes at the expense of not guaranteeing referential integrity.
In our code, we enable foreign key enforcement as standard. This behavior can be turned off with
get_db_con(False): use this to debug database errors.
3.3. Initialize the database via command-line script
In addition to get_db_con() and close_db_con(), we define a custom command-line script init-db which we will call from the terminal to create the SQLite database file later on. Extend 📄db.py with the following function definition:
@click.command('init-db')
def init_db():
    try:
        os.makedirs(current_app.instance_path)
    except OSError:
        pass
    db_con = get_db_con()
    with current_app.open_resource('sql/drop_tables.sql') as f:
        db_con.executescript(f.read().decode('utf8'))
    with current_app.open_resource('sql/create_tables.sql') as f:
        db_con.executescript(f.read().decode('utf8'))
    click.echo('Database has been initialized.')
os.makedirs()creates a folder at locationcurrent_app.instance_path, usually called📁instance/.- Next, we execute the SQL statement from
📄drop_tables.sqlto ensure we will always initialize an empty database. - Then, we execute the SQL statement from
📄create_tables.sqlto create the tables of our data model. - Finally, we let the user know via a terminal message that the
Database has been initialized.
We need to initialize the database with
init-dbjust once, not every time we start the application.
To make 📄db.py useful for our application, 📄app.py needs to be extended a bit:
import os
from flask import Flask
import db

app = Flask(__name__)

app.config.from_mapping(
    DATABASE=os.path.join(app.instance_path, 'todos.sqlite')
)
app.cli.add_command(db.init_db)
app.teardown_appcontext(db.close_db_con)

@app.route('/')
def index():
    return 'Hello, World!'

# [...]
- The main functional addition is to register the
init_db()function from📄db.pywith the command-line interface (CLI) of our current application:app.cli.add_command(db.init_db). - We also provide some Flask configuration, namely a value for
DATABASElocation. - Lastly, we make sure the database connection will always be closed after use with
app.teardown_appcontext(db.close_db_con).
Open a new terminal window, type in flask init-db and press Enter to initialize the database:
(venv) C:\Users\me\projects\webapp> flask init-db
Database has been initialized.
Validate that the SQLite database file 📄todos.sqlite has been created:
┬ webapp/
├─┬ instance/
│ └── todos.sqlite            <-- Newly created SQLite database file
├─┬ sql/
│ ├── create_tables.sql
│ └── drop_tables.sql
├── venv/
├── app.py
├── db.py
└── …
3.4. Populate the database with a sample data set
The database tables are all empty, which we are going to change next. To this end, we will do the following:
- Define some sample data as SQL statement.
- Implement a function that executes the SQL statement.
- Implement a route which will run the function if it is visited by the browser.
First, we define some sample data. In folder 📁sql/ create the file 📄insert_sample.sql with this content:
BEGIN TRANSACTION;
DELETE from todo;
DELETE from list;
DELETE from sqlite_sequence;
INSERT INTO todo (complete, description) VALUES (TRUE, "Get some food");
INSERT INTO todo (description) VALUES ("Drive the bike more often");
INSERT INTO todo (description) VALUES ("Implement web app");
INSERT INTO todo (complete, description) VALUES (TRUE, "Call mom");
INSERT INTO todo (complete, description) VALUES (TRUE, "Clean up");
INSERT INTO list (name) VALUES ("Life");
INSERT INTO list (name) VALUES ("Work");
INSERT INTO list (name) VALUES ("Family");
INSERT INTO todo_list (todo_id, list_id) VALUES (1, 1);
INSERT INTO todo_list (todo_id, list_id) VALUES (2, 1);
INSERT INTO todo_list (todo_id, list_id) VALUES (2, 2);
INSERT INTO todo_list (todo_id, list_id) VALUES (3, 2);
INSERT INTO todo_list (todo_id, list_id) VALUES (4, 3);
INSERT INTO todo_list (todo_id, list_id) VALUES (5, 3);
COMMIT;
The
DELETEstatements at the beginning ensure
- the tables
todoandlistare empty, and- the SQLite-internal table
sqlite_sequenceis also empty, which resets the autoincrement counter back to zero.Only then we insert the subsequent sample data.
Next, extend 📄db.py with:
def insert_sample():
    db_con = get_db_con()
    with current_app.open_resource('sql/insert_sample.sql') as f:
        db_con.executescript(f.read().decode('utf8'))
Lastly, we define the route /insert/sample in 📄app.py:
@app.route('/insert/sample')
def run_insert_sample():
    db.insert_sample()
    return 'Database flushed and populated with some sample data.'
Now we are ready to visit http://127.0.0.1:5000/insert/sample from the browser, which will populate our database with some sample data.
If you use Visual Studio Code, install the extension SQLite by alexcvzz.
After installation, pull up the Palette (Shift+Ctrl+P) and execute the command
sqlite open database. Select thetodos.sqlitedatabase. A new side pane named SQLite Explorer will open on the left-hand side, from which you will be able to inspect thetodos.sqlitedatabase. It should contain the three tables you created, and the tables should be populated with the sample data.
4. Query the database to populate HTML-based Jinja templates
Now that we have some sample data, let’s present those in the browser. In this particular use-case, two views make sense:
- Show all lists
- After clicking on a list, show all to-dos on that particular list
4.1. The base template
Create a new file 📄base.html in the new project sub-folder 📁templates/:
<!doctype html>
<html lang=en>

<head>
    <title>{% block TITLE %}{% endblock %} - To-Do App</title>
</head>

<body>
<nav>
    <h1>To-Do App</h1>
    <a href="{{ url_for('lists') }}">Lists</a>
</nav>
<section class="content">
    <header>{% block HEADER %}{% endblock %}</header>
    {% block CONTENT %}{% endblock %}
</section>
</body>

</html>
- This Jinja template defines the common layout for our web application, mostly consisting of a
<nav>part to place the navigation, and a<section>part to place the dynamic content pulled from the database (i.e., the lists and the to-dos, respectively). - With the
{% block IDENTIFIER %}statement we define placeholder blocks that another template which extends📄base.htmlmay fill in. {{ url_for('lists') }}will fetch the correct route to the list view (in our case/lists/).- The
class="content"attribute within the<section>tag is not yet required - it’s a preparation for later styling with CSS.
url_for()is one of the available Flask functions and objects in Jinja. Others include the Flaskrequestobject (to access the current HTTP request) and theget_flask_messages()function (to fetch Flask flash messages for display).The complete list of available functions and objects is documented here.
4.2. The “lists” view
Next, create a new file 📄lists.html in the same folder:
{% extends 'base.html' %}

{% block HEADER %}
    <h2>{% block TITLE %}Lists{% endblock %}</h2>
{% endblock %}

{% block CONTENT %}
<ul>
{% for list in lists %}
<li>
    <input type="checkbox" disabled=disabled id="{{ list.id }}"
        {% if list.complete %} checked {% endif %}
    >
    <label for="{{ list.id }}">
        <a href="{{ url_for('list', id=list.id) }}">{{ list.name }}</a>
    </label>
</li>
{% endfor %}
</ul>
{% endblock %}
{% extends 'base.html' %}tells Jinja this template is an extension to📄base.html.- Nesting the block
TITLEinto the blockHEADERis a common trick to have uniform titles both on the page itself and on the browser title bar. {% for list in lists %}calls a for loop: apparently for it to work, our business logic will need to provide an iterable object calledliststo the template engine (we’ll do this later).- Furthermore, this template expects that each entry in
listswill provide key-value pairs with the keysid,completeandname- this matches our data model. - Jinja is capable to interpret
url_for()even if called with arguments, as in this case withid=list.id. - In this template we also include an
ifstatement:{% if list.complete %}.
4.3. The “list” view
Clicking on a list entry is supposed to redirect to a new view that will show all to-dos in that particular list.
Create a new file 📄list.html with the following content:
{% extends 'base.html' %}

{% block HEADER %}
    <h2>{% block TITLE %}To-dos on list "{{ list.name }}"{% endblock %}</h2>
{% endblock %}

{% block CONTENT %}
<ul>
{% for todo in list.todos %}
<li>
    <input type="checkbox" disabled=disabled id="{{ todo.id }}"
        {% if todo.complete %} checked {% endif %}
    >
    <label for="{{ todo.id }}">{{ todo.description }}</label>
</li>
{% endfor %}
</ul>
{% endblock %}
- This template is very similar to
📄lists.html. - For this template to be populated correctly, we expect a data structure with keys
id,completeanddescription- which matches our data model. - Furthermore, we expect a variable named
list.nameto hold the name of the list on display.
Unfortuantely
flask run --reloaddoesn’t catch changes to Jinja templates. Hence, whenever you create a new template or change an existing template, you need to restart the web server, i.e.:
- stop the web server with Ctrl+C (on the terminal window running the web server)
- start the web server again with
flask run --reloadSince we just created three new Jinja templates, restart the web server now!
4.4. Database queries to show existing lists and to-dos
With these views in place, it’s now time to define business logic that will pull the required data from our database. Change 📄app.py to the following:
import os
from flask import Flask, render_template, redirect, url_for, request
import db

app = Flask(__name__)

app.config.from_mapping(
    DATABASE=os.path.join(app.instance_path, 'todos.sqlite')
)
app.cli.add_command(db.init_db)
app.teardown_appcontext(db.close_db_con)

@app.route('/')
def index():
    return redirect(url_for('lists'))

@app.route('/lists/')
def lists():
    db_con = db.get_db_con()
    sql_query = 'SELECT * from list ORDER BY name'
    lists_temp = db_con.execute(sql_query).fetchall()
    lists = []
    for list_temp in lists_temp:
        list = dict(list_temp)
        sql_query = (
            'SELECT COUNT(complete) = SUM(complete) '
            'AS complete FROM todo '
            f'JOIN todo_list ON list_id={list["id"]} '
                'AND todo_id=todo.id; '
        )
        complete = db_con.execute(sql_query).fetchone()['complete']
        list['complete'] = complete
        lists.append(list)
    return render_template('lists.html', lists=lists)

@app.route('/lists/<int:id>')
def list(id):
    db_con = db.get_db_con()
    sql_query_1 = f'SELECT name FROM list WHERE id={id}'
    sql_query_2 = (
        'SELECT id, complete, description FROM todo '
        f'JOIN todo_list ON todo_id=todo.id AND list_id={id} '
        'ORDER BY id;'
    )
    list = {}
    list['name'] = db_con.execute(sql_query_1).fetchone()['name']
    list['todos'] = db_con.execute(sql_query_2).fetchall()
    return render_template('list.html', list=list)

@app.route('/insert/sample')
def run_insert_sample():
    db.insert_sample()
    return 'Database flushed and populated with some sample data.'
The business logic on the /lists/ route has the following particularities:
- From the database, we pull all entries from the
listtable and hand the result over to the template (viarender_template()return value). - Since this would be a bit boring, we went the extra mile to also query the database if all to-dos on a particular list have been completed or not - i.e., we compute a
completeflag for eachlistentry. - The data structure returned by the
execute().fetchall()command is of typesqlite3.Row, which can’t be altered. We need to piece together a new data structure on the fly to store the additionalcompleteinformation. We chose to convert each row into a dictionary data structure and add acompletekey-value pair to it. We iterate through each entry, which we store into a list data structure.
The /lists/<int:id> route works as follows:
<int:id>shows Flask that the URL path contains a variable calledidof type integer.- With
idwe query the database twice: first, to get the list’sname, and second to get alltodoson that list. - We combine both
nameandtodosinto a singlelistdictionary: this way, we need to pass on just one variable to the template viarender_template().
It is somewhat unfortunate that we call a collection of to-dos list in our application: in Python, a list is the name of a particular data structure. Python offers a built-in function called
list(). By having named a variable in our codelist, we are shadowing the built-in function of the same name, which is considered bad practice.I included such a major code smell into this notebook for readability, but also to raise your awareness (twice!).
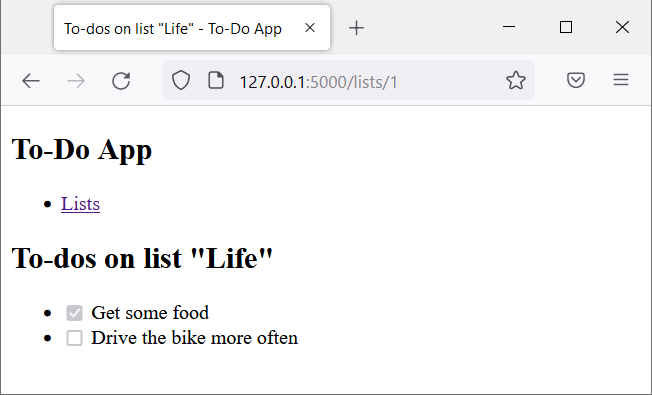
Return to the browser to run the application. You are presented with a bland interface that shows all to-do lists. By clicking on a list name, the app changes the view to show all to-dos on that particular list:
5. Bonus: deliver JSON instead of HTML to the web server
Flask makes it almost trivial to deliver a JSON file: simply return the data structure to be “jsonified”; Flask will handle the rest for you.
With that in mind, change 📄app.py as follows:
# [...]
# existing code
# [...]

@app.route('/lists/')
def lists():
    # [...]
    # existing code
    # [...]

    # return render_template('lists.html', lists=lists)
    # replace existing 'return ...' with:
    if request.args.get('json') is not None:
        return lists
    else:
        return render_template('lists.html', lists=lists)

@app.route('/lists/<int:id>')
def list(id):
    # [...]
    # existing code
    # [...]

    # return render_template('list.html', list=list)
    # replace existing 'return ...' with:
    if request.args.get('json') is not None:
        list['todos'] = [dict(todo) for todo in list['todos']]
        return list
    else:
        return render_template('list.html', list=list)
The two functions lists() and list(), respectively, now catch if ?json has been appended to the URL path: they will return a data structure and not call the Jinja template engine. Flask automatically converts this data structure into a valid JSON file that is then served to the browser.
Call http://127.0.0.1:5000/lists/?json in the browser to receive a JSON file with all to-do lists, e.g.:
[
{
    "complete": 1,
    "id": 3,
    "name": "Family"
},
{
    "complete": 0,
    "id": 1,
    "name": "Life"
},
{
    "complete": 0,
    "id": 2,
    "name": "Work"
}
]
Similarly, appending ?json to the URL of a particular to-do list (e.g., http://127.0.0.1:5000/lists/3?json) will yield a JSON file with all to-dos of that list:
{
    "name": "Family",
    "todos":
    [
        {
        "complete": 1,
            "description": "Call mom",
            "id": 4
        },
        {
            "complete": 1,
            "description": "Clean up",
            "id": 5
        }
    ]
}
I recommend using Firefox for its nice rendering of JSON files.
6. Apply CSS to style the user interface
With very little CSS manipulation, it is possible to change the appearance of the web application completely. CSS (or cascading style sheets) is a language that tells the browser how to render the elements of a structured document, in our case an HTML web page.
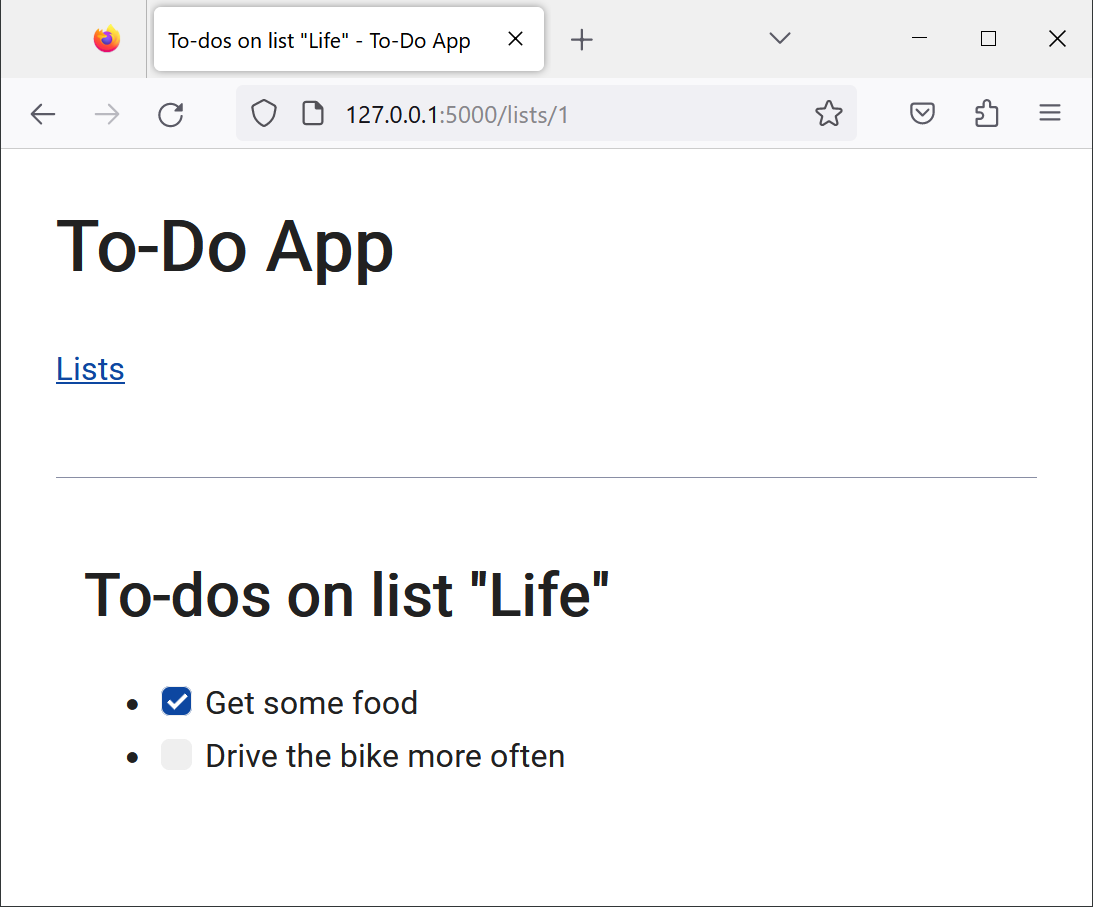
To start out you can avoid writing any custom CSS: just use a classless CSS file, which overrides the standard browser rendering with something more tasteful. Some of the more popular classless CSS files include:
Here is our application styled with the Simple CSS stylesheet:
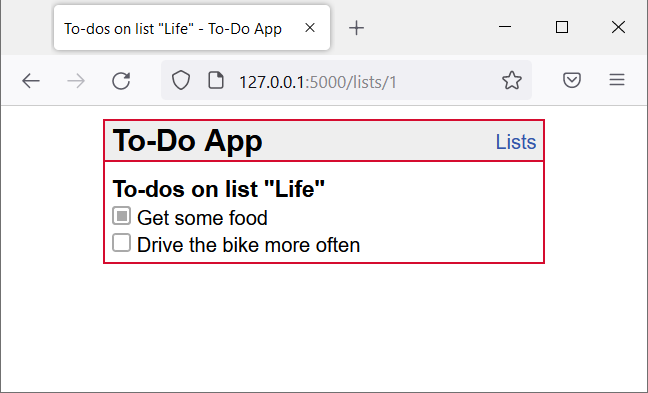
In the following I present a possible hand-crafted result - granted, not particularly pleasing to the eye, but significantly different to the initial state:
Our app shall be styled uniformly across all views. Therefore, it makes sense to centralize all CSS code into a single file and to refer to it within the 📄base.html template:
<!doctype html>
<html lang=en>

<head>
    <title>{% block TITLE %}{% endblock %} - To-Do App</title>
    <link rel="stylesheet" href="{{ url_for('static', filename='css/style.css') }}">
</head>

<body>
<nav>
    <h1>To-Do App</h1>
    <a href="{{ url_for('lists') }}">Lists</a>
</nav>
<section class="content">
    <header>{% block HEADER %}{% endblock %}</header>
    {% block CONTENT %}{% endblock %}
</section>
</body>

</html>
Next, create a file 📄style.css in the new project sub-folder 📁static/css/:
body {
    font-family: sans-serif;
    width: 350px;
    margin: 10px auto;
    border: 2px solid #D50C2F;
}
a {
    color: #35a;
    text-decoration: none;
}
ul {
    list-style: none;
    margin: 0;
    padding: 0;
}
li {
    margin-top: 3px;
}
li input {
    display: none;
}
label::before {
    width: 12px;
    height: 12px;
    border-radius: 3px;
    border: 2px solid darkgrey;
    background-color: #fff;
    display: block;
    content: "";
    float: left;
    margin-right: 5px;
    position: relative;
}
input:checked + label::before {
    background-color: darkgrey;
    box-shadow: inset 0 0 0 2px #FFF;
}
form {
    display: inline;
}
nav {
    background: #eee;
    border-bottom: 2px solid #D50C2F;
    display: flex;
    align-items: center;
    padding: 0 5px;
}
nav h1 {
    font-size: x-large;
    flex: auto;
    margin: 2px 0;
}
nav a {
    text-decoration: none;
}
.content {
    padding: 10px 5px 5px 5px;
}
.content h2 {
    font-size: large;
    margin: 2px 0px;
}
You need to restart the web server to see the styling in action: in the terminal window with the running web server, press Ctrl+c. Then, spin up the server again with flask run --reload. Refresh the browser window to reload the web application, now with CSS styling applied.
While CSS is a rather verbose language with many “verbs”, it is surprisingly easy to learn:
- Start by changing some values from the exemplary CSS file above, refresh the browser to observe any changes.
- Continue with a good CSS tutorial, such as from W3Schools or MDN, and apply your learnings by extending the CSS file above with new declarations.
- Look up any particular syntax in a CSS reference, e.g., on MDN (if you feel particularly brave, head over to the official W3C documentation.)
- For your own project, you might want to consider using a mature CSS framework like Bootstrap (which also includes optional JavaScript code for interactive behavior).
7. The end result
If you followed this notebook, your project folder should contain these sub-folders and files:
┬ webapp/
├─┬ __pycache__/             <-- Cache folder created by Python
│ └── …
├─┬ instance/
│ └── todos.sqlite
├─┬ sql/
│ ├── create_tables.sql
│ ├── drop_tables.sql
│ └── insert_sample.sql
├─┬ static/
│ └─┬ css/
│   └── style.css
├─┬ templates/
│ ├── base.html
│ ├── lists.html
│ └── todos.html
├─┬ venv/
│ └── …
├── app.py
├── db.py
└── …
Congratulations, you have made it to the end of a whirlwind tour across key technologies of full-stack web development!
Optional: ideas to extend functionality
To learn more, I encourage you to extend the functionality of this exemplary to-do application. A few ideas what could be added:
- Change the data schema to include a to-do item
urgency - Create a new to-do item, which must be associated with exactly one list
- Edit the
descriptionof a to-do item - Make the checkbox interactive, i.e. change the
completeproperty of a to-do item - Delete a to-do item
- …
The possibilities are nearly endless!
Copyright © 2026 Prof. Dr. Alexander Eck. All rights reserved.