Updated: 04 Jun 2026, 14:25
Relational databases with Flask-SQLAlchemy
Table of contents
- Learning objective
- 1. Prerequisites
- 2. Create, update, delete operations with basic SQLite
- 3. Database interactions with an object-relational mapper
- 4. Configure Flask-SQLAlchemy
- 5. Create the data model
- 6. Optional: define functions to initialize the database and insert sample data
- 7. CRUD operations with Flask-SQLAlchemy
- 8. Rewrite the application code with Flask-SQLAlchemy
- 9. Bonus: change the database engine with Flask-SQLAlchemy
- Annex: Follow-up recommendations
A code example accompanying this notebook is available on the
fswd-apprepository.First,
git clonethe repository.Next, run
git switch sqlalchemyto switch to thesqlalchemybranch of the repository.The package contains the to-do web app example, as changed throughout this notebook.
Learning objective
After completing this notebook, you will be able to use Flask-SQLAlchemy, a wrapper to SQLAlchemy, which is a popular Python package for interacting with relational databases. With this extension, you won’t need to write SQL statements, but can manipulate data with native Python constructs like objects and class methods.
An object-relational mapper translates between classes (+ instantiated objects) and relational database tables (+ their rows)
For thematic fit, at the start of this notebook you will additionally learn about:
- Performing create, update and delete operations with basic SQLite
- Working around unsupported HTTP request methods in HTML forms
Assumptions
All examples have been tested with a SQLite database. But the beauty of an abstraction layer like SQLAlchemy is that you can easily switch the underlying RDBMS, say to the more capable (but also more heavyweight) PostgreSQL simply by changing a single configuration value (we’ll look at this towards the end).
We assume that database performance is not a concern for our small-scale web app. Therefore, it is completely appropriate to use a database abstraction layer, which invariably introduces overhead over directly constructing and executing SQL statements.
Our web application is built with Flask framework. We won’t use SQLAlchemy directly, but rather via the Flask-SQLAlchemy extension, which provides some nice integrations with Flask. While there are valid reasons for using SQLAlchemy directly, we prefer the increased convenience the Flask extension gives us.
1. Prerequisites
For this notebook we pick up at the end of User interfaces with WTForms and Bootstrap. That is, I expect as a minimum
- A database
📄todos.sqliteexists in the📁instance/folder, - This database is populated with sample data for tables
listandtodo, - The web application is able to request lists and to-dos from the database and show them.
You will need additional Python packages. With the project’s Python Virtual Environment activated and a terminal window opened, install the following:
pip install flask-sqlalchemy
…and out of habit, update your 📄requirements.txt:
pip freeze > requirements.txt
Alternatively, you could have called this command:
pip install -U flask flask-sqlalchemyWith the
-Uflag set,pipwill update the already existing packageflaskand install the new packageflask-sqlalchemy.It is a good idea to run the
-Ucommand once in a while. However, be sure to have a recent📄requirements.txtready, just in case you need to roll back from an update.In such cases either:
- delete your
📁venv/folder and create a new virtual environment withpython -m venv venv, thenpip install -r requirements.txt, (python3 on macOS) or- downgrade to an earlier version, e.g.,
pip install --force-reinstall flask==2.3.3.
Your folder structure might look something like this (Windows example, the 📁venv/ folder on MacOS differs a bit):
┬ webapp/
├── docs/
├─┬ instance
│ └── todos.sqlite
├── sql/
├─┬ static
│ ├── css/
│ └── images/
├── templates/
├─┬ venv/                    <-- Python Virtual Environment folder
│ ├── Include/
│ ├─┬ Lib/
│ │ └─┬ site-packages/
│ │   ├── …
│ │   ├── flask/              <-- Flask package sourced via pip
│ │   ├── flask_sqlalchemy/   <-- Flask-SQLAlchemy package sourced via pip
│ │   ├── …
│ │   ├── sqlalchemy/
│ │   └── …
│ ├── Scripts/
│ └── …
├─ .gitignore
├─ app.py                     <-- Your main application module
├─ db.py                      <-- Your database handling module
├─ forms.py                   <-- Your WTForms classes (optional)
├─ README.md
├─ requirements.txt
└─ …
2. Create, update, delete operations with basic SQLite
Since the Flask framework session, the example code contains operations to create, update, and delete individual to-do items via Python built-in SQLite functionality.
Let’s take a look at this part of the code as baseline, before we dive into SQLAlchemy.
In our example to-do web app, database operations are not separated from the business logic. This is done to keep the following code snippets somewhat compact and not a ‘good practice’: If we had wanted to produce maintainable code, we would have separated those concerns clearly, as per MVC pattern.
Throughout this notebook we regard just the individual to-dos, i.e. we will not add any capability to create, update or delete to-do lists (we simply use those lists created by the sample data set).
2.1. Create a new to-do item
You already know the form for entering a new to-do item from the User interfaces with WTForms and Bootstrap session. Here is the relevant part from 📄todos.html:
<form action="{{ url_for('todos') }}" method="post"
    class="row row-cols-auto g-2 pt-3">
    {{ form.csrf_token }}
    <div class="col">{{ form.description(class='form-control') }}</div>
    <div class="col">{{ form.submit(class='btn btn-primary') }}</div>
</form>
Upon form submission, the function todos() is called with request.method = 'POST':
@app.route('/todos/', methods=['GET', 'POST'])
def todos():
    db_con = db.get_db_con()
    form = forms.CreateTodoForm()
    if request.method == 'GET':
        sql_query = 'SELECT * FROM todo ORDER BY id;'
        todos = db_con.execute(sql_query).fetchall()
        return render_template('todos.html', todos=todos, form=form)
    else:  # request.method == 'POST'
        if form.validate():
            sql_query = 'INSERT INTO todo (description) VALUES (?);'  # (1.)
            db_con.execute(sql_query, [form.description.data])  # (2.)
            db_con.commit()  # (3.)
            flash('Todo has been created.', 'success')
        else:
            flash('No todo creation: validation error.', 'warning')
        return redirect(url_for('todos'))  # (4.)
- The SQL statement is a simple
INSERT INTO ... - Notice how we use the question mark notation afforded by the standard Python SQLite interface.
- Don’t forget to
commit()the SQL statement. - Finally, the function
todos()is called again, now withrequest.method = 'GET'(this is the default value), which renders📄todos.html- hopefully with the newly created to-do item added to the list.
2.2. Update or delete a to-do item
Here are the two forms to update and delete a particular to-do item, respectively, as defined in 📄todo.html:
<form action="{{ url_for('todo', id=form.id.data) }}" method="post" class="col">
<div class="row row-cols-auto g-2">
    {{ form.method(value='PATCH') }}
    {{ form.csrf_token }}
    <div class="col">{{ form.complete(class='form-check-input align-middle') }}</div>
    <div class="col">{{ form.description(class='form-control') }}</div>
    <div class="col">{{ form.list_id(class='form-select') }}</div>
    <div class="col">{{ form.submit(class='btn btn-primary') }}</div>
</div>
</form>
<form action="{{ url_for('todo', id=form.id.data) }}" method="post" class="col">
<div class="row row-cols-auto">
    {{ form.method(value='DELETE') }}
    <div class="col gx-2"><input type="submit" value="Delete" class="btn btn-outline-danger"></div>
</div>
</form>
Upon submission, both forms send a POST request to the route /todos/<int:id>, which calls function todo(id):
@app.route('/todos/<int:id>', methods=['GET', 'POST'])
def todo(id):
    db_con = db.get_db_con()
    if request.method == 'GET':
        pass  # Actual code not shown here for brevity
    else:  # request.method == 'POST'
        form = forms.TodoForm()
        if form.method.data == 'PATCH':  # (1.)
            if form.validate():
                sql_query = 'UPDATE todo SET complete = ?, description = ? WHERE id = ?;'
                db_con.execute(sql_query, [form.complete.data, form.description.data, id])
                sql_query = 'DELETE FROM todo_list WHERE todo_id = ?;'
                db_con.execute(sql_query, [id])
                if form.list_id.data:
                    sql_query = 'INSERT INTO todo_list (todo_id, list_id) VALUES (?, ?);'
                    db_con.execute(sql_query, [id, form.list_id.data])
                db_con.commit()  # (2.)
                flash('Todo has been updated.', 'success')
            else:
                flash('No todo update: validation error.', 'warning')
            return redirect(url_for('todo', id=id))
        elif form.method.data == 'DELETE':
            sql_query = 'DELETE FROM todo WHERE id = ?;'
            db_con.execute(sql_query, [id])
            db_con.commit()
            flash('Todo has been deleted.', 'success')
            return redirect(url_for('todos'), 303)  # (3.)
        else:
            flash('Nothing happened.', 'info')
            return redirect(url_for('todo', id=id))
- HTML forms support just
GETandPOSTHTTP request methods, but neitherPATCHnorDELETE. As workaround, our form supplies an additional value to denote whether to update or delete a to-do item. - The update transaction consists of three separate SQL statements, which are executed sequentially and committed together at the end.
- If either statement fails, the transaction as a whole will not be executed.
- The redirect at the end of the
DELETEbranch is set to return a303HTTP response code - first, to demonstrate this syntax, and second to comply with a RESTful API design convention.- By default, Flask would have returned a
302status code.
- By default, Flask would have returned a
Alternative ways to overcome the
GETandPOSTlimitationUnfortunately, HTML
<form>tags are specified to handle justGETandPOSTHTTP request methods. Extending the standard to additional methods likePATCH,PUT,DELETEhad been discussed but finally abandoned by those involved in the HTML standardization process.For developers using JavaScript, this is not a major concern: the Fetch API provides a straightforward way to create a custom HTTP request method, so they are not limited to what the HTML standard gives them.
We implemented this approach in the
flaskrelease of our example code. Here is the relevant part from📄todo.html:<form action="{{ url_for('todo', id=todo.id) }}" onsubmit="submitForm(event,this,'PATCH')"> <!-- Actual code not shown here for brevity --> <input type="submit" value="u"> </form> <form action="{{ url_for('todo', id=todo.id) }}" onsubmit="submitForm(event,this,'DELETE')"> <input type="submit" value="x"> </form> <script> function submitForm(event, form, method) { fetch(form.action, {method:method, body: new FormData(form)}); event.preventDefault(); if (method == 'DELETE') { setTimeout(function(){window.location.href = "{{ url_for('todos') }}";},10); } else { setTimeout(function(){window.location.reload();},10); } } </script>The JavaScript function
submitForm()constructs the HTTP request we want by leveraging the Fetch API. I won’t go into more detail, since JavaScript is out of scope in this course.With this little JavaScript manipulation, the Flask application receives the proper
request.method. Therefore, we can do something like this (excerpt taken from📄app.pyon theflaskrelease):@app.route('/todos/<int:id>', methods=['GET', 'PATCH', 'DELETE']) def todo(id): db_con = db.get_db_con() if request.method == 'GET': pass # Actual code not shown here for brevity elif request.method == 'PATCH': pass # Actual code not shown here for brevity return redirect(url_for('todo', id=id)) else: # request.method == 'DELETE' pass # Actual code not shown here for brevity return redirect(url_for('todos'), 303)If neither the hidden HTML form element nor the JavaScript approach is to your liking, there is a third alternative: simply define dedicated URL paths for the
PATCHandDELETEactions. That is:@app.route('/todos/<int:id>/patch', methods=['POST']) def patch_todo(id): pass # Meaningful code to update to-do item missing return '' @app.route('/todos/<int:id>/delete', methods=['POST']) def delete_todo(id): pass # Meaningful code to delete to-do item missing return ''Consequently,
📄todo.htmlmust be changed such that the forms point to the correct URL paths:<form action="{{ url_for('patch_todo', id=form.id.data) }}" method="post" class="col"> <!-- Actual code not shown here for brevity --> </form> <form action="{{ url_for('delete_todo', id=form.id.data) }}" method="post" class="col"> <!-- Actual code not shown here for brevity --> </form>
With this implementation, we could be done and move along. But we want to refactor our code for various reasons:
- We don’t want to deal with peculiarities and limitations of SQLite, nor consult the SQLite documentation to reference its syntax. Rather, we’d prefer to perform CRUD operations by manipulating Python-native constructs like objects.
- We want to be able to easily switch the RDBMS (relational database management system) from SQLite to a more capable software such as PostgreSQL later on.
- We don’t mind a small hit at execution performance which a mature database abstraction layer incurs.
To achieve these goals, we turn to SQLAlchemy and the Flask-SQLAlchemy wrapper next.
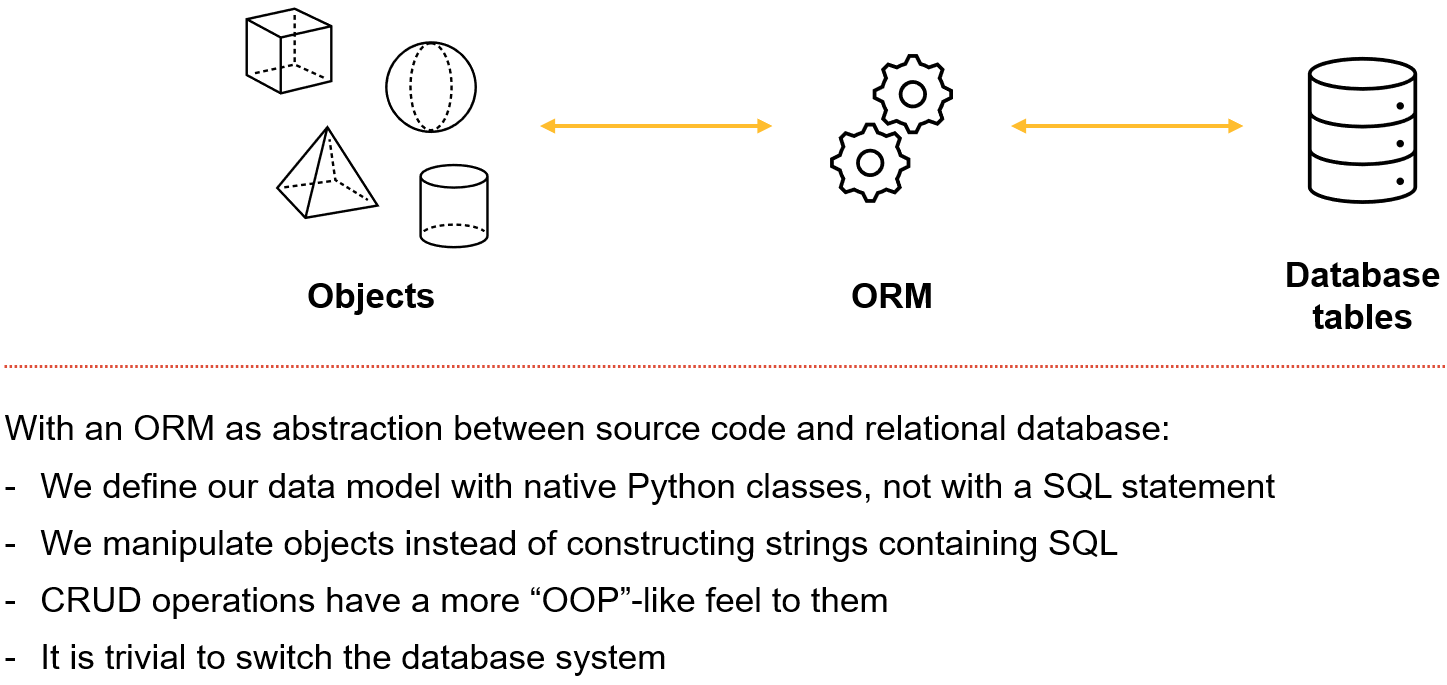
3. Database interactions with an object-relational mapper
SQLAlchemy consists of two abstraction layers:
- The Core, which among other things gives us a generic SQL expression language that abstracts away the differences between SQL flavors of RDBMS such as SQLite or PostgreSQL.
- The object-relational mapper (ORM), which translates from Python classes (incl. relationships between classes) to relational database tables, and vice versa.
Flask-SQLAlchemy primarily exposes the ORM part of SQLAlchemy, and generally increases convenience for a Flask developer. With SQLAlchemy / Flask-SQLAlchemy the workflow for interacting with a database changes significantly.
To illustrate, let’s recap the SQL-centric workflow we already know.
3.1. Workflow based on executing SQL statements
Until now, we have used the SQLite database engine directly:
- Construct a SQL statement (as string) that SQLite can understand.
- Make sure the database connection is open.
- Execute (and commit) the SQL statement.
- Store the return value, e.g., a list of rows from our
todotable. - Handle that return value, e.g., pass it to a HTML template for display in the browser.
…or expressed as Python code:
sql_query = 'SELECT * FROM todo ORDER BY id;'
db_con = db.get_db_con()
todos = db_con.execute(sql_query).fetchall()
return render_template('todos.html', todos=todos)
It is worth noting that most code and also the SQL statements will need adaptation, if you ever decide to switch the RDBMS, for example from SQLite to PostgreSQL.
An exemplary return value from querying our todo table looks like this:
todos = (
    {
        'id': 1,
        'complete': True,
        'description': 'Get some food'
    },
    {
        'id': 2,
        'complete': False,
        'description': 'Drive the bike more often'
    }
)
In this example, we have a Python tuple, and each tuple entry is a Python dictionary (technically, it’s a bit more complicated, but we don’t need to care about this here).
This data structure is very flexible, but semantic knowledge about the data object is missing.
For example, let’s assume we wanted to know to which lists the to-do item with 'id': 2 belongs. For that, we will need to explicitly query the database again, meaning:
- Yet another SQL statement,
- Yet again ensuring we have an open database connection,
- Yet another SQL execute (and commit) command,
- Yet another return value we need to store.
…or expressed as Python code:
todo_id = 2
sql_query = (
    'SELECT id, name FROM list LEFT JOIN todo_list '
    'WHERE todo_list.todo_id = ? '
    'AND list.id = todo_list.list_id;'
)
db_con = db.get_db_con()
todo_lists = db_con.execute(sql_query, [todo_id]).fetchall()
Our approach changes significantly by using an ORM, which we discuss next.
3.2. Workflow based on creating objects
With Flask-SQLAlchemy, the same task - get the lists to which a particular to-do item belongs - is easily implemented:
todo = db.session.get(Todo, 2)
todo.lists  # Access the lists to which to-do with ID 2 belongs
- First, we create an instance of class
Todoand populate it with values retrieved from the database. - This object conveniently has an attribute
listswhich we can access.
That’s it! This example assumes we have a Python class Todo with a lists attribute. Obviously, we need to define this class initially. But once we’ve done this work, we can think in terms of Python objects - and not in terms of SQL statements and Python tuples or dictionaries.
Hence, the workflow with an ORM is object-centric:
- Define the classes that represent your data objects (aka. model) once - in our example,
TodoandList.- Note how this corresponds to the
CREATE TABLEstatement in plain SQL, which we call when we create the database schema.
- Note how this corresponds to the
- To create a new database entry, instantiate the class with attributes (e.g.,
todo=Todo(description='buy some milk'), then tell the ORM to store a representation of this object in the database. - To read an existing database entry, create a new instance that is populated with values retrieved from the database (e.g.,
todo = db.session.get(Todo, 2)). - To update a database entry, first create an instance as in the read case. Next, update one or multiple attributes (e.g., set
todo.complete = True). Finally submit this object to the database via the ORM. - To delete a database entry, first create an instance as in the read case. Then, tell the ORM to delete this object from the database.
The ORM automatically maps the object with appropriate database table(s). Therefore, you can think of the database as a storage space for objects, and don’t necessarily need to think in terms of tables and table rows.
Bottom line: With Flask-SQLAlchemy your mindset needs to change when working with data, most notably when performing CRUD operations with a database. Next, we apply this mindset to a practical example.
4. Configure Flask-SQLAlchemy
The basic steps to integrate Flask-SQLAlchemy with your application are as follows:
- Configure Flask-SQLAlchemy.
- Create the data model, i.e., define the classes that represent your data structure (e.g.,
Todo,List). - Optional: define functions to initialize the database and insert sample data.
With the data model in place (and possibly some sample data in the database), we are then able to refactor all CRUD operations such that they leverage Flask-SQLAlchemy and not operate on SQLite directly.
Switching to Flask-SQLAlchemy requires a major rewrite of our application. Start by deleting all content of 📄db.py. Replace with this starter code:
import click
from flask_sqlalchemy import SQLAlchemy  # (1.)
from sqlalchemy import orm
from app import app

app.config['SQLALCHEMY_DATABASE_URI'] = 'sqlite:///todos.sqlite'  # (2.)

db = SQLAlchemy()  # (3.)
db.init_app(app)  # (4.)
- We import
SQLAlchemyfrom the Flask-SQLAlchemy package, and also the objectappfrom our ownappmodule (i.e., from file📄app.py). - Next, we store the database location as configuration value in
app.- See these examples on how to configure different database engines.
- Then, we create the instance
dbof classSQLAlchemy, which gives us access to the Flask-SQLAlchemy functionality. - Lastly, we associate
dbwithappby callingdb.init_app().- This initialization step is a common pattern for Flask extensions.
5. Create the data model
Let’s briefly recall our exemplary data model:
%%{init: {
  "theme": "neutral"
}}%%
erDiagram
    todo {
        int id PK
        boolean complete
        string description
    }
    todo_list {
        int todo_id FK
        int list_id FK
    }
    list {
        int id PK
        string name
    }
    todo ||--o{ todo_list : "included in zero to many lists"
    list ||--o{ todo_list : "holds zero to many todos"
todostores our to-do items.liststores our to-do list items.todo_listis an association table, it establishes many-to-many relationships betweentodoandlist.
This is how to represent our data model with Flask-SQLAlchemy in file 📄db.py:
class Todo(db.Model):
    id = db.Column(db.Integer, primary_key=True, index=True)
    complete = db.Column(db.Boolean, default=False)
    description = db.Column(db.String, nullable=False)
    lists = db.relationship('List', secondary='todo_list', back_populates='todos')

    def populate_lists(self, list_ids):
        lists = []
        for id in list_ids:
            if id > 0: lists.append(db.session.get(List, id))
        self.lists = lists

class List(db.Model):
    id = db.Column(db.Integer, primary_key=True, index=True)
    name = db.Column(db.String, nullable=False)
    todos = db.relationship(Todo, secondary='todo_list', back_populates='lists')
    complete = False

    @orm.reconstructor
    def check_complete(self):
        self.complete = all([todo.complete for todo in self.todos])

todo_list = db.Table(
    'todo_list',
    db.Column('todo_id', db.Integer, db.ForeignKey('todo.id'), primary_key=True),
    db.Column('list_id', db.Integer, db.ForeignKey('list.id'), primary_key=True)
)

with app.app_context():
    db.create_all()
SQLAlchemy is a rather complicated package. As such, it offers two ways to define a data model:
- Imperative mapping
- Declarative mapping (which plays nicely with Python type hints)
Mostly for readability, I have opted to show you imperative mapping. For production-grade code I recommend declarative mapping, though.
5.1. The Todo and List classes
We start with a discussion of Todo and List. These classes are structurally similar to each other:
- They inherit from class
Model. - Their attributes correspond to table columns in our data model.
- In addition, we define a dedicated attribute to hold the relationship to the other Class.
- This gives us easy access to
todo.lists(all lists to which a to-do belongs), andlist.todos(all to-dos belonging to a list) later on.
- This gives us easy access to
- We conveniently also define some methods to manipulate data.
- Custom methods are optional and its usefulness depends on the actual use-case: we’ll briefly review this part towards the end of this notebook.
We could have supplied a custom table name via attribute
__tablename__. Since we are happy with the default value (the class name in lowercase), we omitted this step, e.g.,:class Todo(db.Model): __tablename__ = 'todo' id = db.Column(db.Integer, primary_key=True, index=True) # [...]
Above, we instantiate
Columnwithout supplying a name as first argument: this way, we let theColumnconstructor set a name for the table column automatically for us (basically, the name of the attribute). Alternatively, we could have writtenid = db.Column('id', db.Integer, ...).Contrast this to the
Columninstantiations fromtodo_listabove, where we manually set a name.
Among other things, the Columm constructor takes a data type as argument, expressed as a SQLAlchemy class, such as Integer, Boolean, and String. Next, we briefly review the available data type classes.
5.2. SQLAlchemy data type classes
Common SQLAlchemy data type classes that may be passed to the Column constructor include:
| Data type class | Python data type | Description |
|---|---|---|
Integer | int | Integer (full number) |
Float | float | Floating-point number |
Boolean | bool | Boolean value (True or False) |
String | str | String |
Text | str | String, but optimized to hold larger text data |
LargeBinary | str | Binary data, (e.g., to store an uploaded .pdf file - avoid) |
DateTime | datetime.datetime | Date and time |
Date | datetime.date | Date only |
Time | datetime.time | Time only |
PickleType | Arbitrary Python object | Holds serialized Python objects (useful for special cases) |
This small selection alone is more varied than the five native SQLite data types, and SQLAlchemy offers many more data type classes. This is one advantage of a database abstraction layer: to the developer, the underlying RDBMS capabilities are not a concern. You simply work with the data type classes offered by SQLAlchemy and - for the most part - forget about the specific RDBMS working under the hood.
5.3. The todo_list table
We continue with todo_list, i.e. with this code:
todo_list = db.Table(
    'todo_list',
    db.Column('todo_id', db.Integer, db.ForeignKey('todo.id'), primary_key=True),
    db.Column('list_id', db.Integer, db.ForeignKey('list.id'), primary_key=True)
)
You certainly noticed that we created an instance of Flask-SQLAlchemy class Table and didn’t define a custom class. (Later, we will use the object todo_list to create a corresponding table in our database.)
The Table constructor takes the table name as first argument (todo_list) and all table columns as subsequent arguments (db.Column()).
When we need an association table in our data model, it is considered good practice to create a
Tableinstance instead of defining a class: in the remainder of our code, we will never directly access the association table, and therefore there is no need to define a classTodoList. (We could have done it nevertheless.)
5.4. Column constructor arguments
The table todo_list consists of two columns, todo_id and list_id. Let’s consider the arguments passed to the Column constructor for todo_id as example:
- First, we give the table column a name, in this case
todo_id. - Then, we define the data type
Integer. - With
db.ForeignKey('todo.id')we establish a foreign key relationship totodo.id(the columnidof tabletodo).ForeignKeyis a SQLAlchemy data type class likeInteger- see🤍 TIPbox below.
- By setting
primary_key=Truewe define this column as a primary key of the table.
Apart from the data type, common arguments passed to the Column constructor include:
| Argument | Description |
|---|---|
db.ForeignKey('table.column') | Set this column as foreign key, associated with table.column |
db.ForeignKey(Class.attribute) | Alternative syntax, using a model class instead the underlying database table |
primary_key=True | Set True to define column as the table’s primary key |
index=True | Set True to put this column into the database index, which speeds up queries |
nullable=False | Set False to define this column as required (i.e., empty value is not allowed) |
unique=True | Set True to disallow duplicate entries for this column (e.g., unique e-mail address) |
default='foo' | Define a default value for the column (example: 'foo') |
When a
Columnis specified as foreign key, we may omit explicit definition of its data type. Hence, instead of:db.Column('todo_id', db.Integer, db.ForeignKey('todo.id'), primary_key=True),… we could have written:
db.Column('todo_id', db.ForeignKey('todo.id'), primary_key=True),
5.5. relationship patterns
Our example shows how to establish a many-to-many relationship between two tables via an association table:
class Todo(db.Model):
    # [...]
    lists = db.relationship('List', secondary='todo_list', back_populates='todos')
    # [...]

class List(db.Model):
    # [...]
    todos = db.relationship(Todo, secondary='todo_list', back_populates='lists')
    # [...]

todo_list = db.Table(
    'todo_list',
    db.Column('todo_id', db.ForeignKey('todo.id'), primary_key=True),
    db.Column('list_id', db.ForeignKey('list.id'), primary_key=True)
)
To establish relationships between tables, SQLAlchemy gives us the relationship() function:
- The first argument of
relationship()takes the class from the “other side” of the relationship. Instead to passing the class, we may alternatively pass a string that corresponds to the class name.- In the
Todoclass, we writedb.relationship('List'), since the classListhas not been defined yet. - In the
Listclass, we writedb.relationship(Todo), since the classTodohas been defined above. (Alternatively, we could have writtendb.relationship('Todo')- this would have caused an irrelevant performance hit.)
- In the
- Which argument(s) to pass next depends on the actual pattern we want to establish.
- In the many-to-many case, we provide the name of the association table via
secondaryargument. Note how we supply the object name in string form, sincetodo_listis yet to be defined. (If we were to define ‘todo_list’ first, we could have used the ‘todo_list’ object directly for a minor performance gain.) - The additional
back_populatesargument points to the relationship attribute of the other class - this is optional but avoids errors, so there’s no harm in supplying this argument as well.
- In the many-to-many case, we provide the name of the association table via
Another popular relationship is many-to-one. Consider this example:
%%{init: {
  "theme": "neutral"
}}%%
erDiagram
    todo {
        int id PK
        boolean complete
        string description
        int urgency_id FK
    }
    urgency {
        int id PK
        string level
    }
    todo }o--|| urgency : has
Each entry in todo is associated with exactly one entry in urgency (e.g., low, medium, high), and multiple to-dos might share the same urgency.
To establish this many-to-one relationship in the data model:
class Todo(db.Model):
    # [...]
    urgency_id = db.Column(db.Integer, db.ForeignKey('urgency.id'))  # (1.)
    # [...]

class Urgency(db.Model):
    id = db.Column(db.Integer, primary_key=True, index=True)
    level = db.Column(db.String, nullable=False)
    todos = db.relationship(Todo, backref='urgency')  # (2.)
- With
urgency_idin classTodowe establish the foreign key relationship the same way you already know fromtodo_list. - In the
Urgencyclass definition, we define thetodosattribute as a reference toTodo.- In addition, within
relationship()we provide thebackref='urgency'argument. This will create an attribute calledurgencyin any instance ofTodo.
- In addition, within
By now you have certainly noticed how SQLAlchemy gives you many options (too many?) to achieve the same result. If you prefer clarity in your model, use ‘back_populates’ instead of ‘backref’, for an explicit definition of the ‘urgency’ attribute in ‘Todo’, like so:
class Todo(db.Model):
    # [...]
    urgency_id = db.Column(db.Integer, db.ForeignKey('urgency.id'))
    urgency = db.relationship('Urgency', back_populates='todos')
    # [...]

class Urgency(db.Model):
    id = db.Column(db.Integer, primary_key=True, index=True)
    level = db.Column(db.String, nullable=False)
    todos = db.relationship(Todo, back_populates='urgency')
With the relationship established in this manner, we can access the “other side” rather conveniently. Assume we want to know the urgency level of a particular to-do:
todo = db.session.get(Todo, 2)  # Get to-do with id=2
print(todo.urgency.level)  # Print this to-do's urgency level, e.g., 'high'
… and to get a list of all to-do items of a particular urgency:
urgency = db.session.get(Urgency, 3)  # Get urgency with id=3, e.g., 'high'
todos = urgency.todos  # Store iterable of all to-dos with urgency_id=3
Obviously, there are more relationship patterns than the two presented here. For a comprehensive description, consult the SQLAlchemy documentation.
5.6. Ensure the database tables exist
Finally, we review the last two lines of the code example from above. These ensure the database tables exist as we have defined them above:
with app.app_context():
	db.create_all()
The first line creates a Flask application context, which is required to interact with the database.
On the second line, we call create_all(). This function takes our data model (i.e., Todo, List, todo_list) and creates corresponding tables in the database for us (i.e., tables todo, list, todo_list). If tables with those names already exist in the database, the function does nothing.
If you change your SQLAlchemy data model after tables have been created, ‘create_all()’ will not update the database schema for you - you have to take care of such migrations on your own.
With that, we did the hard work: we translated our data model into Python-native constructs, namely:
- Two classes named
TodoandList, with attributes and methods inherited from base classModel. We will later instantiate these classes to create, read, update, and delete data. - An instance
todo_listof classTable, which is needed to create the many-to-many relationship betweenTodoandList.
6. Optional: define functions to initialize the database and insert sample data
In this optional step, we replicate the behavior of our previous database module:
- Add a function that is registered with the Flask command-line interface to initialize (or reset) the database with all tables.
- Add a function that inserts some sample data into the database.
Here are the required additions to 📄db.py:
# Existing code not shown for brevity

@click.command('init-db')
def init():  # (1.)
    with app.app_context():
        db.drop_all()
        db.create_all()
    click.echo('Database has been initialized.')

app.cli.add_command(init)  # (2.)

def insert_sample():
    # Delete all existing data, if any
    db.session.execute(db.delete(todo_list))
    db.session.execute(db.delete(Todo))
    db.session.execute(db.delete(List))

    # Create sample to-do items
    todo1 = Todo(complete=True, description='Get some food')
    todo2 = Todo(description='Drive the bike more often')
    todo3 = Todo(description='Implement web app')
    todo4 = Todo(complete=True, description='Call mom')
    todo5 = Todo(complete=True, description='Clean up')

    # Create sample to-do list items
    list1 = List(name='Life')
    list2 = List(name='Work')
    list3 = List(name='Family')

    # Associate to-do items to lists by filling their `Todo.list` attribute
    todo1.lists.append(list1)
    todo2.lists.append(list1)
    todo2.lists.append(list2)
    todo3.lists.append(list2)
    todo4.lists.append(list3)
    todo5.lists.append(list3)

    # Add all objects to the queue and commit them to the database
    db.session.add_all([todo1, todo2, todo3, todo4, todo5, list1, list2, list3])
    db.session.commit()
- The function
init()is surprisingly unspectacular. Within a Flask application context:drop_all()deletes all tables defined in our data model (i.e.,todo,list,todo_list).create_all()restores the same tables.
app.cli.add_command(init)is needed to register the function with the Flask command-line interface. Now, we can run the commandflask init-dbfrom the terminal to execute theinit()function.- The function
insert_sample()is more interesting, since it showcases how to delete and how to create database entries. We revisit this code in the next section about CRUD operations.
7. CRUD operations with Flask-SQLAlchemy
CRUD operations with Flask-SQLAlchemy are object-centric: we create, update and delete objects to modify our database.
The SQLAlchemy ORM is very powerful. Here we list a small selection of common use patterns:
| CRUD | Code snippet | Description |
|---|---|---|
| Create | object = ModelClass(column1=value1, ...)db.session.add(object)db.session.commit() | Create object, add it to the “add” queue, commit to database. |
| Read | list_of_objects = db.session.execute(db.select(ModelClass)).scalars() | db.session.execute() executes arbitrary SQL statements. Let SQLAlchemy construct the SQL statement for us with db.select(). scalars() returns a list of objects as result. |
| Read | object = db.session.execute(db.select(ModelClass). filter_by(attrib=val)).one() | While scalars() returns a list of objects, one() returns just one object - useful when you want exactly one entry from the database. |
| Read | object = db.session.get(ModelClass, pk_attribute) | db.session.get() is a shortcut if you need one entry identified via primary key (e.g., an ID). |
| Update | object.attribute = new_valuedb.session.commit() | Update object attribute(s), commit to database. |
| Update | object1.attribute.append(object2)db.session.commit() | Update object attribute of Python list type with append(), commit to database - useful to establish a relationship with a second object. |
| Delete | db.session.delete(object)db.session.commit() | Add object to the “delete” queue, commit to database. |
| Delete | db.session.execute(db.delete(ModelClass)) | Alternative way to delete - useful to delete all entries of a table. |
With this table, you should be able to understand how the previous code for creating sample code works, and also how the following code example operates.
8. Rewrite the application code with Flask-SQLAlchemy
Next, we need to rewrite all code in our main application file 📄app.py that deals with data. The full rewrite follows next.
To attract your attention, all data-manipulating code portions are commented with # !!.
from flask import Flask, render_template, redirect, url_for, request, abort, flash
from flask_bootstrap import Bootstrap5
import forms

app = Flask(__name__)

app.config.from_mapping(
    SECRET_KEY = 'secret_key_just_for_dev_environment',
    BOOTSTRAP_BOOTSWATCH_THEME = 'pulse'
)

from db import db, Todo, List, insert_sample  # (1.)

bootstrap = Bootstrap5(app)

@app.route('/')
@app.route('/index')
def index():
    return redirect(url_for('todos'))

@app.route('/todos/', methods=['GET', 'POST'])
def todos():
    form = forms.CreateTodoForm()
    if request.method == 'GET':
        todos = db.session.execute(db.select(Todo).order_by(Todo.id)).scalars()  # !!
        return render_template('todos.html', todos=todos, form=form)
    else:  # request.method == 'POST'
        if form.validate():
            todo = Todo(description=form.description.data)  # !!
            db.session.add(todo)  # !!
            db.session.commit()  # !!
            flash('Todo has been created.', 'success')
        else:
            flash('No todo creation: validation error.', 'warning')
        return redirect(url_for('todos'))

@app.route('/todos/<int:id>', methods=['GET', 'POST'])
def todo(id):
    todo = db.session.get(Todo, id)  # !!
    form = forms.TodoForm(obj=todo)  # (2.)  # !!
    if request.method == 'GET':
        if todo:
            if todo.lists: form.list_id.data = todo.lists[0].id  # (3.)  # !!
            choices = db.session.execute(db.select(List).order_by(List.name)).scalars()  # !!
            form.list_id.choices = [(0, 'List?')] + [(c.id, c.name) for c in choices]  # !!
            return render_template('todo.html', form=form)
        else:
            abort(404)
    else:  # request.method == 'POST'
        if form.method.data == 'PATCH':
            if form.validate():
                form.populate_obj(todo)  # (4.)  # !!
                todo.populate_lists([form.list_id.data])  # (5.)  # !!
                db.session.add(todo)  # !!
                db.session.commit()  # !!
                flash('Todo has been updated.', 'success')
            else:
                flash('No todo update: validation error.', 'warning')
            return redirect(url_for('todo', id=id))
        elif form.method.data == 'DELETE':
            db.session.delete(todo)  # !!
            db.session.commit()  # !!
            flash('Todo has been deleted.', 'success')
            return redirect(url_for('todos'), 303)
        else:
            flash('Nothing happened.', 'info')
            return redirect(url_for('todo', id=id))

@app.route('/lists/')
def lists():
    lists = db.session.execute(db.select(List).order_by(List.name)).scalars()  # (6.)  # !!
    return render_template('lists.html', lists=lists)

@app.route('/lists/<int:id>')
def list(id):
    list = db.session.get(List, id)  # !!
    if list is not None:
        return render_template('list.html', list=list)
    else:
        return redirect(url_for('lists'))

@app.route('/insert/sample')
def run_insert_sample():
    insert_sample()
    return 'Database flushed and populated with some sample data.'
Compared with the previous version, the main differences are:
- No more strings to construct SQL statements (
sql_query = ...) - No handling of database connections (
db_con = db.get_db_con()) - Data is handled via objects with well-defined attributes and methods (see our data model)
- Overall, considerably fewer lines of code for the same behavior
Six lines of codes are worth mentioning separately:
from flask import Flask, render_template, redirect, url_for, request, abort, flash
# [...]
app = Flask(__name__)
# [...]
from db import db, Todo, List, insert_sample  # (1.)
The import statement for the db module happens only after the object app has been created. We can’t import db earlier, since db depends on app.
@app.route('/todos/<int:id>', methods=['GET', 'POST'])
def todo(id):
    todo = db.session.get(Todo, id)  # !!
    form = forms.TodoForm(obj=todo)  # (2.)  # !!
# [...]
We use the obj attribute supplied to the WTForms Form constructor to populate the to-do edit form with data stored in the todo object.
@app.route('/todos/<int:id>', methods=['GET', 'POST'])
def todo(id):
    # [...]
    if request.method == 'GET':
        if todo:
            if todo.lists: form.list_id.data = todo.lists[0].id  # (3.)  # !!
            # [...]
For simplicity, we built the exemplary to-do edit form such that we can show and select only one list entry. Hence we just select the first entry from todo.lists for display by the form.
@app.route('/todos/<int:id>', methods=['GET', 'POST'])
def todo(id):
    # [...]
    else:  # request.method == 'POST'
        if form.method.data == 'PATCH':
            if form.validate():
                form.populate_obj(todo)  # (4.)
                # [...]
populate_obj() is a convenience function of the WTForms Form class, which plays nicely with SQLAlchemy. It updates the attributes of the passed object (here: todo) with data sent via the form.
Here is the equivalent update done manually:
todo.complete = form.complete.data
todo.description = form.description.data
…or, if you don’t want to use the WTForms form object, but rather the Flask request object:
todo.complete = bool(request.form.get('complete'))
todo.description = request.form.get('description')
@app.route('/todos/<int:id>', methods=['GET', 'POST'])
def todo(id):
    # [...]
    else:  # request.method == 'POST'
        if form.method.data == 'PATCH':
            if form.validate():
                form.populate_obj(todo)  # (4.)
                todo.populate_lists([form.list_id.data])  # (5.)  # !!
                # [...]
On line # (5.) the method populate_lists() gets called, which we defined with class Todo:
class Todo(db.Model):
    # [...]
    def populate_lists(self, list_ids):
        lists = []
        for id in list_ids:
            if id > 0: lists.append(db.session.get(List, id))
        self.lists = lists
This method updates the to-do list relationships of a to-do item. Our form supplies just one to-do list id (form.list_id.data) - but the method could easily handle multiple ids.
@app.route('/lists/')
def lists():
    lists = db.session.execute(db.select(List).order_by(List.name)).scalars()  # (6.)  # !!
    return render_template('lists.html', lists=lists)
The template 📄lists.html expects an attribute complete for each list entry which displays as a checked box if True:
<!-- [...] -->
<input class="form-check-input" type="checkbox" id="{{ list.id }}" disabled
        {% if list.complete %} checked {% endif %}
    >
<!-- [...] -->
The complete attribute is not pulled from the database, but computed on-the-fly upon instantiation of List. With the @orm.reconstructor decorator we instruct SQLAlchemy to run the check_complete() method from our List class upon instantiation:
class List(db.Model):
    # [...]
    complete = False

    @orm.reconstructor
    def check_complete(self):
        self.complete = all([todo.complete for todo in self.todos])
You might be wondering why we don’t compute the
completeattribute value within the__init__()method. Simple: SQLAlchemy ignores custom__init__()functions. Therefore, we need to use the@orm.reconstructordecorator instead.
With this rewrite done, we are finally ready to run the web application with flask run. Well done!
9. Bonus: change the database engine with Flask-SQLAlchemy
Let’s assume your current database runs with SQLite:
app.config['SQLALCHEMY_DATABASE_URI'] = 'sqlite:///todos.sqlite'
To let the web application use PostgreSQL, all you need to do is a configuration change, e.g., to:
app.config['SQLALCHEMY_DATABASE_URI'] = 'postgresql://myuser:mypassword@localhost/todos'
That’s it. The application now uses the database todos hosted on your local PostgreSQL instance.
With that, there are a few steps to get PostgreSQL running in the first place (which is why it is so convenient to start with SQLite for any new project):
pip install psycopg2-binaryinto your Python Virtual Environment: SQLAlchemy needs this database adapter to interact with PostgreSQL.- Download and install PostgreSQL on your local machine. Per default, the database server will be exposed on address
localhost(aka.127.0.0.1). - Create a login role with name
myuserand passwordmypassword; and create a database calledtodos. It is convenient to use pgAdmin for these tasks. - Spin up the app with
flask run(or, runflask db-initonce) to create the required tables.
Annex: Follow-up recommendations
Although you should be able to cover a majority of your data handling needs with the material covered here, we have merely scratched the surface of Flask-SQLAlchemy and the underlying SQLAlchemy framework.
Unfortunately, it is not so easy to recommend usable follow-up resources, mainly for three reasons:
First, it is somewhat confusing at the beginning that Flask-SQLAlchemy does not transparently expose SQLAlchemy functionality, but rather provides its own classes and methods, such as Model and session() - through which ultimately SQLAlchemy functionality is accessed.
A good strategy is to start with the following short tutorials on Flask-SQLAlchemy:
… and then look into the SQLAlchemy documentation for specific deep dives.
Second, SQLAlchemy recently underwent a major overhaul (known as SQLAlchemy 2.0). Most notably, it is strongly discouraged to use two very popular concepts:
QueryAPI has become legacy- Use of imperative style model definition is discouraged; instead declarative mapping should be used. (For teaching, I currently prefer the first style over the second.)
However, SQLAlchemy has become very popular with Python developers in general and Flask developers in particular, and many tutorials exist that use Query API and imperative style.
So whenever you come across a tutorial that uses some code like ModelClass.query.all(), know that you should switch to the future-proof pattern of db.session.execute(db.select(...)). With that, there are a few good tutorials around, such as:
- The Flask-SQLAlchemy tutorial by Miguel Grinberg
- The Flask-SQLAlchemy tutorial on Hackers and Slackers
Miguel Grinberg also covers Flask-Migrate, an extension that helps with database change management. This is very useful when you expect your data model to change over time as your application grows in functionality.
Third, SQLAlchemy is a very complicated framework, which makes it possible to achieve the same result in multiple ways. For example, anything done with SQLAlchemy ORM (which Flask-SQLAlchemy predominantly uses) can also be achieved with SQLAlchemy Core. For that reason, the official tutorial is very long, often presenting several alternatives one after another without proper framing or contextualization.
Having said that, a more beginner-friendly way is to watch some of the talks and video tutorials collected on this SQLAlchemy page.
Copyright © 2026 Prof. Dr. Alexander Eck. All rights reserved.