Updated: 01 Apr 2026, 23:00
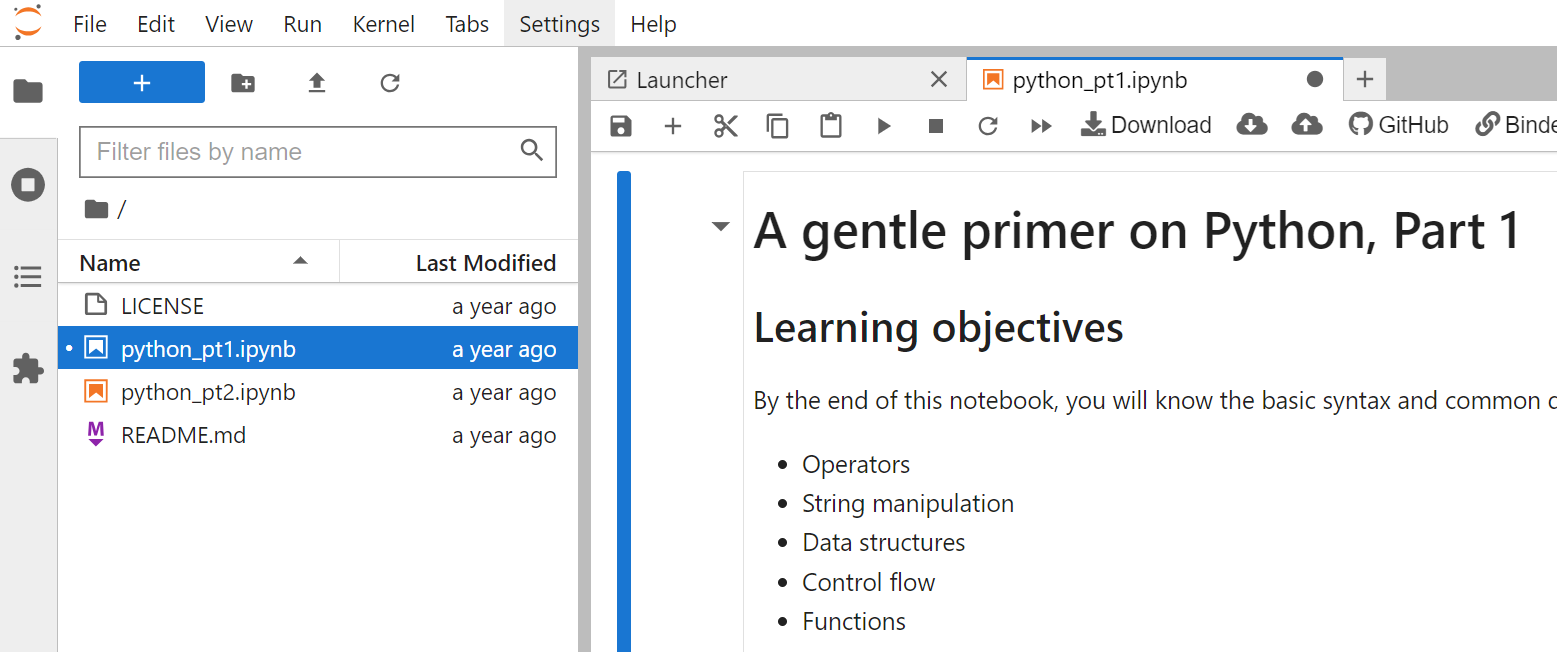
Getting started with Python, Part 1
Table of contents
Learning objectives
By the end of this notebook, you will know the basic syntax and common design concepts of Python, including:
- Operators
- String manipulation
- Data structures
- Control flow
- Functions
As a prerequisite, I assume that you have already written software code before, albeit in a different language like Java. Having said that, the notebook content should still be rather beginner-friendly.
0. Initial installation and configuration steps
If you don’t want to go through the hassle of local installation, simply launch the notebook in Binder. (This service often won’t work due to resource limitations, though).
You may then skip this Step 0 altogether.
This lesson is meant to be walked through as a Juypter Notebook. To get you prepared, we will configure Visual Studio Code (VS Code) such that it can execute Jupyter Notebook files. Alternatively, you may configure Jupyter Notebook as stand-alone installation.
0.1. Download the lesson repository, configure a Python Virtual Environment
Start by downloading the lesson repository: https://github.com/hwrberlin/fswd-python.
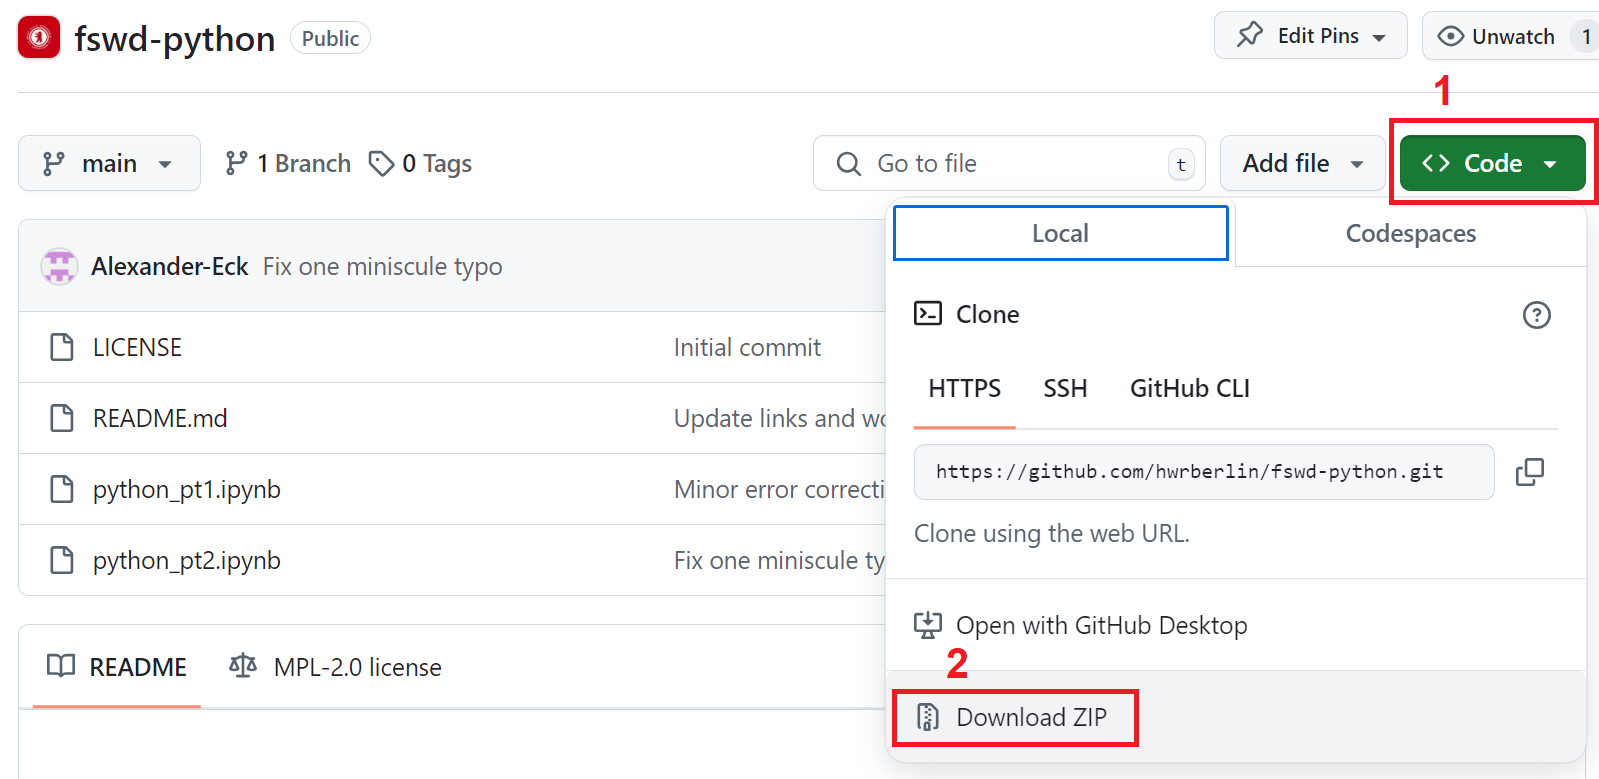
Export the downloaded .zip file in a folder of your choice, e.g., 📁C:\Users\me\projects\. Unzip the download.
If you are familiar with Git and GitHub, you can alternatively fork the lesson repository and clone it to your local machine, in a folder of your choice.
Start VS Code. Usually, you will be greeted with a Welcome screen. Click Open Folder… and navigate to the unzipped folder.
VS Code will open the contents in a dedicated workspace (i.e., into its own editor window).
Next, create a Python Virtual Environment and activate it.
Then, install jupyter and ipykernel with pip:
pip install jupyter ipykernel
0.2. Set up a Jupyter Notebook environment in Visual Studio Code
Still in Visual Studio Code, press Shift+Ctrl+X / Shift+⌘+X, search for and install the extension “Jupyter”. This install includes additional packages (called “Extension Pack”), don’t be confused by that. Restart the software in case you are asked to.
Now you are ready to interact with the Jupyter notebooks shipped with the repository, which you identify by their *.ipynb extension (this stands for “IPython Notebook”).
Before you continue, consult this Jupyter Notebooks in Visual Studio Code tutorial. It will teach you the user interface.
You may now switch to the interactive Jupyter notebook (recommended). Alternatively, just continue reading this document.
1. Hello, World!
We start with a one-line “Hello, World!” message to the prompt. Execute this cell:
print("Hello, World")
This is boring and spectacular at the same time: Boring, since the Python script doesn’t do that much. Exciting, since it took just one line of code with one function call to implement an executable example (compare this with Java). Note that the line end is not closed with a semicolon ;.
This next example is a bit more interesting:
# If/else variant of "Hello, World!"
message = "Hello, World!"
if message:
    print(message)
else:
    print("We'll never be here.") # This string will be lost in space and time
- No
{ }, i.e. no curly brackets! To increase code readability and reduce errors, Python uses indentation to group statements. In practice, you either let the code editor do the work, or indent by hitting the Tab key. (Most editors will produce four empty space characters per Tab by default – this is a touchy topic for some devs). Transitioning from Java, this might look confusing and a little bit like magic at first, but you will get the hang of this feature pretty fast. - Comments are started with the
#sign (aka “pound”, “hash”, or “number” sign). The remainder of the line following the pound sign will be a comment, unless there’s an"(double quote) or'(single quote) before: both"#comment"and'#comment'are strings, not comments. (You may use both singe and double quotes to form a string.) There are no multi-line comments in Python. - Lastly, you may have noticed that while the variable
messageis recognized as astring, you did not need to explicitly specify its data type - Python will infer that during runtime. This behavior is called dynamic typing, as opposed to static typing that you might know from Java.- Still, Python supports a variant of static typing if you want to. We will discuss this feature in the second notebook.
1.1. Exercise
This first exercise is very simple:
- Change something in the “Hello, World!” example above to force an error message. For example, introduce a typo somewhere in the code.
- Can you make sense of the error message?
2. Operators
2.1. Arithmetic operators
The arithmetic operators in Python are pretty self-explanatory:
add = 1 + 5                     # 6
add += 5                        # 11
float_number = (5 * 6 - 2) / 8  # = 3.5
int_number = (5 * 6 - 2) // 8   # = 3
modulo = 22 % 7                 # = 1
power = 3 ** 2                  # = 9

print(
    f'add: {add}, '
    f'float_number: {float_number}, '
    f'int_number: {int_number}, '
    f'modulo: {modulo}, '
    f'power: {power}'
)
- The
//operator performs a floor division, i.e. it rounds down the result to the nearest integer. - The
%(modulo) operator is commonly overlooked by beginners - but it is immensely useful. - Exponentiation is performed with
**; the more intuitive^would perform a bit-wise XOR operation. - If you combine any arithmetic operator with
=(the assignment operator), that operator will be applied to the variable on the left and the result stored in that variable. For example,add += 5is equivalent toadd = add + 5. This syntax will save you some keystrokes.
2.2. Operators with English names
This category is not an official name from Python, but I find it suitable: logical operators, membership operators and identity operators are written in plain English, so you don’t have to remember any weird syntax:
# Logical operators: and, or, not
print((not(1 == 1 and 2 == 3)) or 3 == 3)  # True

# Membership operators: in, not in
full_name = 'Joe Doe'
print('Doe' in full_name)  # True

list_var = [1, 2, 3]
print(2 in list_var)      # True
print(4 not in list_var)  # True

dict_var = {"ID": 1, "name": "Joe"}
print("ID" in dict_var)    # True
print ("Joe" in dict_var)  # False

# Identity operators: is, is not
x, y = 2.0, 2
print(x is y)      # False
print(x is not y)  # True
- In Java, the equivalent to the logical
andis&&, the equivalent tooris||. - The operator to test for equality (i.e.,
==) is the same in Python and Java. - To test for inequality, either test for equality and then negate the result with
not(), or use the inequality test operator!=. Hence, bothnot(1 == 2)and1 != 2evaluate toTrue. - The
inoperator tests for membership in array-like variables (called sequences in Python). This operator is very versatile: you can apply it to strings, lists, dictionaries, and many more (more on lists and dictionaries later on). In most cases, its use is intuitive. - The
isoperator tests for object identity, not value identity:2.0(a float object) is different to2(an integer object). - I included some syntactic sugar: Python lets you assign values to more than one variable in one line - separate both variables and values with a
,(comma sign), respectively. Sometimes you want to do this for increased readability or if you know a function will return more than one value.
You can’t name a variable
and,in,is, etc.: Python reserved a few keywords. However, variable names are case-sensitive, hence the variable nameaNdwould be okay.Since we already discuss variable naming: by convention, Python variables are written in snake_case, not camelCase as in Java. Many people will argue that separating words by
_(underscore) is more readable than the camel-case alternative.
2.3. Exercise
We all know that 42 is the answer to everything:
- Write (1) addition, (2) substraction, (3) multiplication and (4) division operations that all result in the number
42. Assign these operations to four different variables. - Evaluate with
==andandoperators that the values of these four variables indeed are 42. - Print the result, which should be
True. - Next, evaluate the same thing but this time by using only the
==operator.
Here is the expected output:
True

True
3. String manipulation
In a typical Python application, you will manipulate strings a lot. Luckily, Python has pretty good support for this data type. There are three main concepts to remember when working with strings (my personal selection - Python provides lots of tools for text processing).
3.1. String class methods
First, you need to understand that a variable of type string (like any variable in Python) is an object (here: an instance of the string class), which means that it comes with built-in string methods. For example, you can do the following:
full_name = 'Joe Doe'

first_name, last_name = full_name.split(" ")
print(first_name)  # Joe

last_name_index = full_name.index(last_name)
print(last_name_index)  # 4

print(full_name.lower())  # joe doe
A code editor like Visual Studio Code will give you tool-tips with available methods and attributes - make use of this feature.
3.2. Sequence operations
Second, you should know that a string behaves like a sequence (after all, a string is a sequence of characters in a particular order). For instance, you can do this:
full_name = 'Joe Doe'
first_name, last_name = full_name.split(" ")
last_name_index = full_name.index(last_name)

# Get length of the string
full_name_length = len(full_name)
print(full_name_length)  # 7

# Get character at index 4 (i.e., the fifth character)
print (full_name[4])  # D

# Get the last name (function call extended over multiple lines)
print(
    full_name[
        last_name_index :
        full_name_length
    ]
)  # Doe

# Get the last name (alternative syntax)
print(full_name[last_name_index : ])  # Doe
len()is one of a number of handy built-in functions that can be applied to most data types in Python.- The
s[i]operation will return the entry at index positioni- in our example, the letterD. - The
s[i:j]operation will return the slice from index positionito index positionj. In our example, we started at the position of the first letter of the last name and stopped at the last position. (We achieve the same result withfull_name[last_name_index : ].) - To increase readability, Python lets you break up function calls over multiple lines. You just need to provide indentation to notify Python that a single command extends over multiple lines. The rules are pretty intuitive. To be clear: this applies universally in Python, not only to this particular use case.
3.3. Multi-line strings, value injection at runtime
Third, you should know how to (1) extend string literals over multiple lines, and (2) how to inject variable values during runtime. Several approaches are available (W3Schools shows a selection) - here is a demonstration of a particularly readable option for both (1) and (2):
user_id = 10

# Variant 1: string on one line
sql = f'SELECT * FROM users WHERE id={user_id} ORDER BY name; '
print (sql)  # SELECT * FROM users WHERE id=10 ORDER BY name;

# Variant 2: string on one line, but multiple ' ' signs
sql = 'SELECT * FROM users ' f'WHERE id={user_id} ' 'ORDER BY name;'
print (sql)  # SELECT * FROM users WHERE id=10 ORDER BY name;

# Variant 3: string extending multiple lines - note the enclosing ( ) signs
sql = (
    'SELECT * FROM users '
    f'WHERE id={user_id} '
    'ORDER BY name; '
)
print (sql)   # SELECT * FROM users WHERE id=10 ORDER BY name;
- Strings between multiple pairs of
' 'sings are combined to a single string. - To break up the string over multiple lines, enclose it between
( ) - Use the
f'{variable}'notation to insert the value of avariable
3.4. Exercise
For this next exercise, I want you to do the following:
- Find two quotes from people that inspire you.
- Define two variables, one to hold the
quoteand another to store theauthor. - Assign the first quote string to
quote, and the first author toauthor. - Transform the
quotestring such that the words start with an uppercase character. - Transform the
authorstring such that all characters are uppercase. - Print the
quoteand theauthorin a format like this (including quotation marks):{AUTHOR} once said: "{Inspiring Quote}". - Next, print the second quote and the second author the same way.
Here is the expected output format:
HAMLET once said: To Be Or Not To Be, That Is The Question.

LUKE SKYWALKER once said: May The Force Be With You.
4. Data structures
Python has four built-in data structures (also called compound data types or collections) to group together related values in one variable. These are list, tuple, set, and dictionary:
| Data structure | Example | Ordered | Changeable | Allow duplicates | Remark |
|---|---|---|---|---|---|
| List | [1, 5, 9] | Yes | Yes | Yes | The most versatile data structure |
| Tuple | ('Joe', 'Doe') | Yes | No | Yes | Cannot be changed after creation |
| Set | {'apples', 'oranges'} | No | (Yes) | No | Items can be added or removed, but not manipulated |
| Dictionary | {'id': 1, 'first_name': 'Joe', 'revenue': 80.5} | Yes | Yes | (No) | list of key-value pairs; duplicate keys not allowed |
- “Ordered” means that the individual entries can be accessed by index. For example
('Joe', 'Doe')[0]will returnJoe, the first entry in the tuple. - “Changeable” means individual entries can be modified, new ones can be added, and existing ones can be removed.
- “Allow duplicates” means that the variable may hold the same value more than once. If you try adding a duplicate value to a set, it will simply be discarded.
Actually, Python ships with more than these four data structures. With the exception of frozenset (which is a built-in data structure), these are included in the separate
collectionsmodule, which is part of the Python standard library.For example, the deque data structure is optimized for accessing the first and last item in a collection - hence ideal if you need a stack, a queue, or a double-ended queue.
4.1. Each data structure has its own raison d’être
At first, you might be confused why Python makes a point by offering four different data structures. Indeed, you can realize any use-case with lists alone, and don’t strictly need the others. At the face of it, the following variable assignments may seem interchangeable:
# List data structure
list_var = [1, 'Joe Doe', 80.5]
print(list_var)  # [1, 'Joe Doe', 80.5]

# Tuple data structure
tuple_var = (1, 'Joe Doe', 80.5) # Enclosing parantheses '( )' not required
print(tuple_var)  # (1, 'Joe Doe', 80.5)

# Set data structure
set_var = {1, 'Joe Doe', 80.5}
print(set_var)  # {80.5, 1, 'Joe Doe'}

# Dictionary data structure
dict_var = {'id': 1, 'full_name': 'Joe Doe', 'revenue': 80.5}
print(dict_var)  # {'id': 1, 'full_name': 'Joe Doe', 'revenue': 80.5}
However, it is more than worth learning to handle all four data structures, since each one has unique qualities. Consider this toy example:
# Create a list, append an item
user_ids = [1, 5, 9]
user_ids[0] = 2
print(user_ids[0])  # 2

# Split a string, store result as a tuple
first_last_name = tuple('Joe Doe'.split(" "))
print(first_last_name[1])  # Doe

# Create a set, add another item (set drops any duplicate values)
fruit_inventory = {'apples', 'oranges', 'apples'}
fruit_inventory.add('oranges')
print(fruit_inventory)  # {'apples', 'oranges'}

# Create a dictionary, add another key-value pair
user = {'id': 1, 'first_name': 'Joe', 'last_name': 'Doe'}
user['revenue'] = 80.5
print(user)  # {'id': 1, 'first_name': 'Joe', 'last_name': 'Doe', 'revenue': 80.5}
print(user.keys())  # ['id', 'first_name', 'last_name', 'revenue']
print(user.values())  # [1, 'Joe', 'Doe', 80.5]
- With the list
user_idswe collect IDs that are of interest to us. Since the list is changeable, we could for instance override its first value:user_ids[0] = 2, which changes the list to[2, 5, 9]. - Instead of creating two variables, we simply hold first name and last name returned by
full_name.split(' ')in an ordered, but immutable tuple (note that we calledtuple()to change the output ofsplit()into the tuple data structure). - The set we created above holds just
{'apples', 'oranges'}(in any order, so{'oranges', 'apples'}would also be possible). With a set, we can ensure to keep only unique entries and will get rid of duplicate values automatically. In addition, searching for a particular entry performs much faster on a set compared to the other data structures. - Lastly, the values stored in the dictionary could have easily be attributes of an object, for which we would have needed to define a class first - much easier to hold structured data this way. (If you read and write data in the JSON format, you’ll find dictionaries to be the perfect match.)
4.2. Nesting is allowed
You can nest data structures, i.e., you are allowed to provide a data structure as a value entry of another data structure. For example, this is possible:
user = {
    'id': 1,
    'name': {'first': 'Joe', 'last': 'Doe'},
    'address': {'street': 'Main Ave', 'city': 'Springfield'},
    'birthday': (1990, 11, 30)
    }

print(user['id'])               # 1
print(user['name']['first'])    # Joe
print(user['address']['city'])  # Springfield
print(user['birthday'][0])      # 1990
Showing the numerous possibilities of the built-in data structures goes well beyond the scope of this notebook. To learn more, head over to the official Python tutorial on data structures.
4.3. Exercise
Let’s assume you’re going to throw a dinner party. To keep track of whom you invited, you naturally write a Python program:
- Make an
inviteeslist with at least three people that you want to invite. - Manually
print()a short invitation to each invitee. - The first invitee can’t make it, so you you’ll invite another one instead. Let
invitees[0]know you’re sorry they can’t make it. Overwrite this slot with the new person, and invite this person. - You want to squeeze in another guest, so you’ll
append()your list with this name, and extend the invitation to her. - Unfortunately, this last invitee can’t make it, so you’ll
pop()her name from the list and let her know you’re sorry they can’t make it. - Finally, get the number of invitees with
len(). Print this number, together with the names of all invitees.
Here is the expected output format:
You're invited, Joe!
You're invited, Niki!
You're invited, Maxi!

Sorry you can't make it, Joe!
You're invited, Alex!

You're invited, Nora!

Sorry you can't make it, Nora!

3 guests invited:
['Alex', 'Niki', 'Maxi']
5. Control flow: conditional statements if, else, elif
The control flow is the core part of your Python code, since that is the sequence in which the individual steps are executed (or evaluated). The basic control flow elements are:
- Conditional statements if, else, elif (this section)
- While loops and for loops (next section)
Python is (mostly) an imperative programming language, in which the programmer uses control flow to define how the program shall operate.
Contrast this to a declarative programming language like SQL, in which the program describes what the program shall accomplish.
Having said that, Python supports functional programming, which some argue is a variant of declarative programming.
5.1. Structure of conditional statements
The conditional statements if and else work exactly as you would expect. Consider this example which checks for free ticket eligibility:
FREE_LIMIT = 5
CHILD_LIMIT = 14

ticket_price = 19.95
my_age = 14
with_chaperon = True

if my_age <= FREE_LIMIT:
    ticket_price = 0.0
    print('Free ticket: child under 6')
elif (my_age <= CHILD_LIMIT
        and with_chaperon):
    ticket_price = 0.0
    print('Free ticket: child under 15 accompanied by chaperon')
else:
    print(f'Regular ticket price: €{ticket_price}')

# Result: 'Free ticket: child under 15 accompanied by chaperon'
- A conditional statement consists of a header and a body
- The header starts with
{if, elif, else}and ends with a colon: - In-between you define the statement to be evaluated to
TrueorFalse - To extend a conditional statement over multiple lines, you must enclose it with parantheses
( ), otherwise these are optional. - If a header evaluates to
True, the subsequent code block (aka. body, sometimes also called “suite”) will be executed.
5.2. The elif statement
elif stands for “else if”, which saves you many new lines & indentations. Consider the two variants (without and with elif, respectively):
x = 1
y = x + 1

# Variant 1: not using elif
if x == y:
    print('x equals y')
else:
    if x > y:
        print('x is larger than y')
    else:
        print('x is smaller than y')
# Result: 'x is smaller than y'

# Variant 2: using elif
if x == y:
    print('x equals y')
elif x > y:
    print('x is larger than y')
else:
    print('x is smaller than y')
# Result: 'x is smaller than y'
You can use
elifto the same effect that you know from the Javaswitch/casestatement.Another alternative to emulate [
switch/case] is the use of structural pattern matching: you test an expression (e.g., a variable) against one or more patterns and execute the following code block if there’s a match.
5.3. Truthy and falsy values
An if (or elif) statement header must evaluate to a boolean value (True or False). The statement can be arbitrarily complex (e.g., you may call a function in-between), but in the end the result must be either True or False.
Having said that, Python makes this task a lot easier for you, because you can test any value for truth, irrespective whether it is of type bool or not. By default, everything is considered True unless specified otherwise. For example, if 5 evaluates to True, whereas if 0 evaluates to False. We could do something like this:
mistakes = 5

# Variant 1: leverage 'truthy / falsy'
if mistakes:
    print(f'There are {mistakes} mistakes left to fix!')
else:
    print('All nice and fine!')
# Result: 'There are 5 mistakes left to fix!'

# Variant 2: explicitly test for truth value
if mistakes > 0:
    print(f'There are {mistakes} mistakes left to fix!')
else:
    print('All nice and fine!')
# Result: 'There are 5 mistakes left to fix!'
This behavior is sometimes called truthy / falsy value interpretation, which is also known in other languages like JavaScript.
5.4. Exercise
At times we might forget whether we’re still kids or already adults. Fortunately, Python comes to the rescue:
- Store your
age(in years) in a variable. - Check that
ageis a number larger than0by leveraging the truthy / falsy behavior of Python. If noageis given or if it’s0,print()an error message. - After this initial check, write a series of conditional statements that checks
ageandprint()the resulting category:- Less than 1 year old:
Your're a baby - Less than 3 years old:
You're a toddler - Less than 12 years old:
You're a kid - Less than 18 years old:
You're a teenager - Less than 50 years old:
You're an adult - Less than 100 years old:
You're a best-ager - 100 years or older:
You're seriously old
- Less than 1 year old:
Here is the expected output format:
You're an adult
6. Control flow: while loops and for loops
6.1. Structure of while loops and for loops
Let’s start with while loops: They do exist in Python, and it is completely okay for you to define a while loop. However, it is rarely used in our context of web app development, so we’ll skip while loops here.
The for loop syntax is best compared to the for-each syntax in Java. With the for loop, you take each element of a sequence and perform some kind of computation on it. Here’s an example:
fruits = ['apple', 'plum', 'orange', 'kiwi', 'pear', 'melon']

for fruit in fruits:
    print(fruit)  # apple  plum  orange  kiwi  pear  melon
- After the initial
for, define the item variable (which exists just in theforloop), herefruit. - The sequence to be looped through follows after the
inkeyword. - The
forstatement header ends with a colon:, just like theifstatement does. - The subsequent code block is executed until we run out of item variables (in this case, six times)
Next, we take a look at two built-in functions that are commonly used together with for loops:
- The
range()function - The
enumerate()function
6.2. The range() function
Let’s assume you want to emulate the behavior of a classic Java for loop. You can do that with the built-in range() function:
sentence = ['Mi', 'casa', 'es', 'su', 'casa']

for i in range(3):
    print(sentence[i])  # Mi  casa  es
range()generates a sequence of numbers of specified length. In its default configuration, the function generates ascending numbers, starting with the value0.- The
forloop iterates through each element of the sequence just created byrange(). - We use that number as index to access individual items on the
sentencelist, thus effectively looping through the first three elements ofsentencein this example.
6.3. The enumerate() function
Also quite useful is the built-in enumerate() function. By using it in a for loop, you get easy access to the index number of the looped-through sequence:
sentence = ['Mi', 'casa', 'es', 'su', 'casa']

for i, word in enumerate(sentence):
    print(f'{i}: {word}')  # 0: Mi  1: casa ...
Note how you can have more than one item variables in a
forloop.
Without enumerate(), you’ll need a helper variable for the same effect:
sentence = ['Mi', 'casa', 'es', 'su', 'casa']

i = 0
for word in sentence:
    print(f'{i}: {word}')  # 0: Mi  1: casa ...
    i += 1
6.4. Iterating through dictionaries
A for loop iterates through a dictionary, but differently to what you might expect:
user = {
    'id': 1,
    'name': {'first': 'Joe', 'last': 'Doe'},
    'address': {'street': 'Main Ave', 'city': 'Springfield'},
    'birthday': (1990, 11, 30)
    }

for item in user:
    print(item)  # id  name  address  birthday
This loop will print out the keys, not the values, i.e., id name address birthday. To get to the values, you must access them via the keys like so:
for key in user:
    print(user[key])  # 1  {'first': 'Joe', 'last': 'Doe'} ...
Alternatively, you may leverage the items() method of the dict class:
for key, value in user.items():
    print(f'key: {key} .... value: {value}')  # key: id .... value: 1 ...
The loop in the code block above will print out both the keys and values. Of course you may simply disregard the keys and just use the values (or the other way round).
6.5. Exercise
Many applications allow just unique usernames, and your app is no different:
- Create a
userslist of at least three usernames, including the name “admin”. - Loop through the list: if you encounter the
usercalled “admin”,print()out a special greeting. - Create a
new_userslist of at least three usernames, one of which is the same as in theuserslist. - Iterate through
new_usersto check if any of the new usernames is already in use. If not,append()them tousers. If the username is already taken,print()out a message. - Ensure that your comparison is case insensitive: if “ALEX” is already in the
userslist, neither “alex” nor “Alex” (or any other variant) should be accepted. - You want to introduce user ids, which will allow you to accept duplicate usernames in the future. Change
usersto a list of dictionaries with ascending values for theidkey, andnamevalues taken from theuserslist. - Finally, get the number of users with
len(). Print this number, together with the ids and names of all users.
Here is the expected output format:
Welcome, admin!

Sorry, maxi: You'll need to choose a different username.

5 registered users:
[{'id': 1, 'name': 'Joe'}, {'id': 2, 'name': 'Maxi'}, {'id': 3, 'name': 'admin'} ...]
7. Functions
A function is some code that is executed every time it is called.
7.1. Function header and function body
To define a function in Python, use the def keyword. Here is an example:
def body_mass_index(weight, height, round_digits=1):
    bmi = round((weight / height ** 2), round_digits)
    return bmi

print(body_mass_index(85, 1.85))  # 24.8
print(body_mass_index(75, 1.85, 4))  # 21.9138
print(body_mass_index(height=1.85, weight=75))  # 21.9
A function always starts with the function header, which consists of:
- The
defkeyword - The function name (here:
body_mass_index) - Zero or more input arguments between the mandatory parentheses
( ) - A colon
:at the end of the function header
Note how you are allowed to provide a default value for arguments - in the example above,
round_digits=1. Arguments with a default value are optional (if no input value is provided, the default will be applied)
Since Python is a dynamically typed language, you don’t specify the return type, unlike in a statically typed language like Java.
To find out the data type of a variable or a value, use the built-in
type()function. For example, the expressiontype(1.0) is floatwill evaluateTrue.
When calling the function, note how you:
- Don’t need to provide input values for any optional argument (if you’re happy with the default).
- Are allowed to change input order if you provide both argument name and its value.
The input arguments can be distributed over more than one line to improve readability, i.e., the function header is not necessarily just one line. For example, this is valid code:
def body_mass_index(
    weight,
    height,
    round_digits=1
):
    pass  # Nothing implemented yet
You may have noticed that I call the slots in the function definition arguments and the data to be passed to the function values. Another common terminology is the pair of parameters and arguments, respectively.
In other words:
('argument', 'value')is equivalent to('parameter', 'argument').So watch out what is meant by argument in a particular document: sometimes it’s the slot, sometimes it’s the data.
Everything below the function header that is indented is the function body: in the example above the calculation of the body mass index, with some rounding applied.
If you want an empty function body, simply put in the pass statement. This is commonly done to indicate that there’s still some implementation work ahead.
Often, you want a function to return something. A function without a return statement also returns something, namely the None object.
Next, we take a look at some syntactic sugar related to functions, namely accepting arbitrary arguments with the * and ** notations.
7.2. Handling arbitrary arguments as function input
You will encounter many functions with arguments like these two examples:
def my_function(foo, *args):
    pass

def my_function2(bar, **kwargs):
    pass
The important operators are the asterisk characters (* or **, respectively). By convention, the argument name following * is args (for arguments), and the argument name following ** is kwargs (for keyword arguments).
The
argsandkwargsnames are really just a convention: the name after the (double-)asterisk operator can be chosen freely. For instance,Flask.add_url_rule()uses the**notation to allow passing on specific option flags. This argument is aptly called**optionsand not**kwargs.
A function defined with the asterisk or double-asterisk notation accepts arbitrary input arguments when being called. Arbitrary can also mean no input at all, i.e., both *args and **kwargs arguments are completely optional.
For example, this next example performs multiplication with an arbitrary amount of numbers:
def multiplication(unit, *args):
    if len(args):
        result = 1.0
    else:
        return None
    for arg in args:
        result *= arg
    return f'{result} {unit}^{len(args)}'

print(multiplication('m', 2, 2, 3))  # 12.0 m^3
print(multiplication('cm', 12, 4))  # 48.0 cm^2
print(multiplication('no unit'))  # None
A function will become even more flexible if it accepts keyword arguments:
def print_key_value(**kwargs):
    print('----')
    for key, value in kwargs.items():
        print(f'{key}: {value}')
    print('****')

# Variant 1: call function with 'argument = value' notation
print_key_value(
    id = 1,
    name = {'first': 'Joe', 'last': 'Doe'},
    address = {'street': 'Main Ave', 'city': 'Springfield'},
    birthday = (1990, 11, 30)
)
# Result: ----  id: 1  name: { ... ... ****

# Variant 2: transform dict to 'argument = value', then give this as input to function
user = {
    'id': 1,
    'name': {'first': 'Joe', 'last': 'Doe'},
    'address': {'street': 'Main Ave', 'city': 'Springfield'},
    'birthday': (1990, 11, 30)
    }
print_key_value(**user)
# Result: ----  id: 1  name: { ... ... ****
- Both function calls to
print_key_value()are correct and they return the exact same result. - In the first function call, we provide arbitrary argument names and their values in the
argument = valueformat. - In the second call, we use the
**operator to transform the dictionary nameduserto theargument = valueformat first, which is then passed to the function.
In practice, you will encounter the second use pattern more often than the first one.
You don’t need to ever actively use the
*,**notations. But you will certainly see many examples using this notation, so it will be useful if you are able to understand such code.
7.3. Exercise
Producing and selling customized t-shirts is currently the hottest digital business model. You want to participate, and it all starts with a simple function:
- Define a function
produce_shirt()that takes a t-shirtsize(S, M, …) and amessageto be printed on the shirt as arguments. The function shouldprint()a summary of both values. Test out this function. - Extend the function with some error handling:
- The
sizemust be a value that matches with a set of allowed values (e.g.,{'S', 'M', 'L', 'XL'}). - The
messagecan’t be longer than42characters.
- The
- Call
produce_shirt()with values that will violate both conditions. The function shouldprint()error messages. - Modify the function such that it will produce an “M”-sized t-shirt with the message “I love the smell of Python in the morning!” if no other values are supplied. Try this out by invoking
produce_shirt()without any value. - Modify the function once more. This time, you allow an arbitrary number of strings to be passed. The function concatenates all strings together (with a whitespace in-between strings) to form the
message. The42characters limit still applies. Then, test the function.
Here is the expected output format:
Producing a t-shirt size "M" with the message "Don't be evil" next.

T-shirt size "perfect fit" does not exist.
The supplied message is longer than the allowed 42 characters.

Producing a t-shirt size "M" with the message "I love the smell of ...

The supplied message is longer than the allowed 42 characters.
And with that: congratulations, you’ve reached the end of this notebook!
Annex: Online resources to follow-up with
We’ve just scratched the surface, so it’s a good idea to follow up with additional online resources. What follows is a curated list of recommended resources.
- Python learning path from Microsoft: This learning path is appropriate for beginners that have no problem using Microsoft-supplied tools, most notably Visual Studio Code. While sign-up is not required, it is useful to get access to interactive coding sandboxes. If you have time for only one follow-up, complete this learning path.
- Python intro course by Udacity: Interactive introductory lessons from Udacity. While free of charge, you will need to provide some personal data to get started. The Udacity course will go through much the same topics as this notebook, but with more patience.
- Official Python tutorial: The official Python tutorial covers key concepts rather systematically, but not always in an easy-to-follow manner.
- Python tutorial from W3Schools: Similar to the official Python tutorial, but more accessible since it provides examples that are more to the point - with a slight bias towards topics relevant for data scientists.
Copyright © 2026 Prof. Dr. Alexander Eck. All rights reserved.