Updated: 10 Apr 2026, 10:48
Python and Visual Studio Code setup
Table of contents
Learning objectives
By completing this tutorial, you will have installed and configured the following on your local machine:
- Python interpreter
- Visual Studio Code with Python and Jinja extensions
- Workspace for your semester project
- Python Virtual Environment inside the workspace
- Flask framework inside the Python Virtual Environment
I assume that you start from scratch, i.e. without Python nor Visual Studio Code installed on your computer. You might run into errors if Python has been installed already, e.g., as part of an Anaconda installation.
I tested this tutorial on current releases of both Windows and macOS. In general, some steps might be performed differently on your machine, since user interfaces (e.g., the Windows Explorer) tend to change between system updates. If you run into an error: Google is your friend.
1. Install a Python interpreter
Python is on a yearly release cycle, with major versions typically released in early October.
The latest major version as of this writing is Python 3.14, released 07 October 2025.
🖥️ Windows
1.1.W. Preferred: install Python from python.org
Download and install Python from python.org. You want to follow the link: Or get the standalone installer for Python 3.xx.x.
With the installer, it is best to activate the “Add python.exe to PATH” checkbox.
The checkbox might alternatively say “Add Python to environment variables”
Normally, you should not need to activate “Use admin privileges when installing py.exe”. If you run into unexpected errors later on, consider re-installing Python with this checkbox activated (for that you’ll need to launch the installer with admin rights).
1.2.W. Alternative method: install Python from Microsoft Store
In some cases the preferred installation method fails, or launching Python from the terminal throws you an error. If the Microsoft Store app is installed on your local machine, you may source Python from the Microsoft Store.
1.3.W. Verify Python installation
Press ⊞ (Win key), then type c m d and confirm with Enter to open the Windows terminal application called Command Prompt. Run this command:
python -V
This is
python -Vwith capital “V”!
The Python version number should be displayed, e.g., Python 3.14.3. If you get an error message, something went wrong with your installation:
- Restart your computer and try again.
- Run the installation steps again, now possibly with admin rights.
- Google to troubleshoot.
🍎 macOS
Traditionally, macOS comes with Python preinstalled. But don’t get your hopes up: due to various reasons, this install is not very useful any more (this was different in older in older versions of macOS…). Hence, you will need to install Python manually. The preferred way is to use Homebrew.
1.1.M. Preferred: install Python via Homebrew
Homebrew is the most popular package manager for macOS (most Linux distributions come with a package manager preinstalled, by the way). With Homebrew you will be able to safely install Python on macOS.
First, you need to install Homebrew. Start the macOS Terminal application and type in:
/bin/bash -c "$(curl -fsSL https://raw.githubusercontent.com/Homebrew/install/HEAD/install.sh)"
Next, the Homebrew installation script advises you to run the following commands - but replace <user> with your user account:
echo >> /Users/<user>/.zprofile
echo 'eval "$(/opt/homebrew/bin/brew shellenv)"' >> /Users/<user>/.zprofile
eval "$(/opt/homebrew/bin/brew shellenv)"
Then, install Python:
brew install python3
Finally, close the Terminal application.
1.2.M. Alternative method: install Python from python.org
Download and install Python from python.org. Usually it is safe to simply click on the yellow “Download Python 3.xx.x” button.
To make sure, here is the dedicated macOS download page: https://www.python.org/downloads/macos/
1.3.M. Verify Python installation
Open the Terminal application. Run this command:
python3 -V
This is
python3 -Vwith capital “V”!
The Python version number should be displayed, e.g., Python 3.14.3. If you get an error message, something went wrong with your installation:
- Restart your computer and try again.
- Run the installation steps again, now possibly with admin rights.
- Google to troubleshoot.
2. Install Visual Studio Code and prepare your workspace
2.1. First things first: create a project folder
In your preferred root folder (e.g., your folder for this Module), create a new folder 📁webapp/. On a Windows machine, the full path might look like this: 📁C:\Users\me\projects\webapp\
2.2. Install Visual Studio Code with Python and Jinja extensions
Download and install Visual Studio Code from Microsoft.
🍎 macOS
On macOS, you should manually drag the downloaded VS Code executable into your Application folder!
Here are keyboard shortcut cheat sheets for Visual Studio Code (assumes US English keyboard layout):
Start Visual Studio Code, then press Shift+Ctrl+X / Shift+⌘+X to open the “Marketplace Extensions” side pane. Search for Python (Publisher: Microsoft), click on the proper result and install the extension (this will take a while). Ensure the extension has been enabled (this will be indicated on the extension’s page).
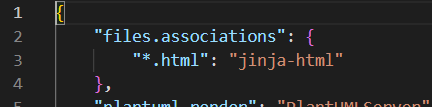
In the same manner, install Better Jinja (Publisher: Samuel Colvin). This extension needs some configuration: pull up the command palette with Shift+Ctrl+P / Shift+⌘+P, then start typing preferences: open user settings (json) and select that command. A 📄settings.json file will open in the editor. Right after the first opening curly bracket {, i.e. on line #2, write (and save):
    "files.associations": {
        "*.html": "jinja-html"
    },
If your
📄settings.jsonis empty, you can copy and paste this code snippet into it:{ "files.associations": { "*.html": "jinja-html" } }Otherwise, it might look something like this:
{
    "files.associations": {
        "*.html": "jinja-html"
    },
    "workbench.colorTheme": "Default Dark+",
    "files.autoSave": "afterDelay"
}
This setting enables proper highlighting of Jinja syntax in .html files.
Enable auto-save in Visual Studio Code! Otherwise, you need to manually save your file after every change. (This is a common mistake.)
Simply click File -> Auto Save to enable auto-save.
If you want more control about the auto-save behavior:
- With Ctrl+, / ⌘+, open the Settings page. (Alternatively, click File -> Preferences -> Settings.)
- In the search bar at the top, type in
auto save. Change the setting fromoffto some other value, .e.g,afterDelay.- Scrolling down the list you’ll notice additional options, e.g., after which delay auto-save should happen (the default are
1000ms).
2.3. Set project folder as active workspace
With Visual Studio Code open, press Ctrl+K+O / ⌘+K+O (alternatively, File -> Open Folder), navigate to your 📁webapp/ project folder and open it to set this folder as active workspace of the code editor.
2.4. Create a new terminal session
Press Shift+Ctrl+P / Shift+⌘+P to open the command palette, and start typing terminal create new terminal. Accept the command. On the lower part of the IDE, a pane should open with a terminal window. Draw the pane up if it is too narrow.
The terminal session you just created works exactly as the stand-alone terminal application you know from Windows or macOS.
Verify the terminal opened in your project folder. On a Windows machine, you should be greeted with something like this (on macOS the prompt will look somewhat different):
Microsoft Windows [Version 10.0.26100.8037]
(c) Microsoft Corporation. All rights reserved.

C:\Users\me\projects\webapp>
3. Create a Python Virtual Environment, activate it, and install Flask
The steps below are written with Visual Studio Code in mind. You can run all terminal commands also from a stand-alone terminal window - you don’t have to use Visual Studio Code to follow this next section.
3.1. Create a folder with a vanilla Python Virtual Environment install
Still on the terminal pane in Visual Studio Code (pointed at your project folder), type in the following and wait a bit:
🖥️ Windows
python -m venv venv
🍎 macOS
python3 -m venv venv
This sets up a vanilla Python Virtual Environment in the folder 📁venv/.
In case you were wondering: a “Python Virtual Environment” has nothing to do with a virtual machine (VM). Think of it as a project folder, where you collect all dependencies needed to run your Python application.
If you like, run the command above with a different folder name as last argument (e.g., python -m venv virtualenvironment).
Fixes to possible errors
If you get an error message, simply re-start Visual Studio Code and try again.
If this didn’t fix your error, the virtualenv package might be missing from your Python installation. To fix, type in:
pip install -U virtualenvIf the previous command didn’t work, try this one instead:
🖥️ Windows
python -m pip install -U virtualenv🍎 macOS
python3 -m pip install -U virtualenv…then run the
venvcommand again.
3.2. Use the Python Virtual Environment as default for this workspace
🖥️ Windows
Windows only: set default terminal application
Windows comes with two terminal applications: Command Prompt and the more modern and substantially more capable PowerShell. When trying to run the script that activates the Python Virtual Environment with PowerShell you might run into a policy violation (depending on how your Windows installation has been configured). There are two quick ways to solve this problem.
I recommend you set Command Prompt as default terminal application in Visual Studio Code: Press Shift+Ctrl+P, then start typing
terminal select default profile, accept the selection and choose Command Prompt from the menu.Alternatively, type in this command every time before activating the Python Virtual Environment:
Set-ExecutionPolicy -ExecutionPolicy RemoteSigned -Scope Process
For added convenience and to reduce errors, it makes sense to tell Visual Studio Code that you want to use your project’s Python Virtual Environment every time you run a Python script within this workspace.
Press Shift+Ctrl+P / Shift+⌘+P to open the command palette and start typing python select interpreter. Accept the command by pressing Enter and choose the Python interpreter from your project’s 📁venv/ folder. Usually, Visual Studio Code will highlight this with a star (☆).
Press Shift+Ctrl+P / Shift+⌘+P again, now start typing terminal create new terminal. Accept the command to launch a new terminal. Visual Studio Code should launch the Python Virtual Environment for you. If everything worked as intended, this will be indicated with (venv) at the beginning of the terminal line.
Sometimes the automation mentioned above will fail. In that case simply restart Visual Studio Code and pull up a new terminal as instructed above.
Should this also fail, then you will need to activate the Python Virtual Environment in the
📁venv/folder manually.Still in your terminal pane within Visual Studio Code run the activation script:
🖥️ Windows
With the Command Prompt application:
.\venv\Scripts\activate.batWith the PowerShell application:
.\venv\Scripts\Activate.ps1🍎 macOS
source venv/bin/activateAlternatively, you may navigate to the target folder with
cdand run the script from there (e.g.,cd /venv/Scripts, thenactivate.bat). Navigate up to your project root folder afterwards:cd ../..The active Python Virtual Environment will now be indicated with
(venv)at the beginning of the terminal line.
3.3. Install Flask
With a terminal open and the Python Virtual Environment active, run this command to install Flask with all its dependencies:
pip install flask
3.4. Verify installation
In the “Explorer” side pane (Shift+Ctrl+E / Shift+⌘+E), you should see the 📁venv/ folder you created before. Drill down to the 📁site-packages/ folder to validate that Flask has been installed correctly (on macOS the folder structure is a bit different):
┬ webapp/
├─┬ venv/                    <-- Python Virtual Environment folder
  ├── Include/
  ├─┬ Lib/
  │ └─┬ site-packages/       <-- Folder containing Flask + dependencies
  │   ├── flask/
  │   ├── jinja2/
  │   └── …
  ├── Scripts/
  └── …
Congratulations, you have set up your work environment and are now ready to code some Python!
4. Optional: validate everything works by implementing a ‘Hello, World!’ application
Press Shift+Ctrl+P / Shift+⌘+P again, now start typing file new file. Accept the command. The cursor jumps into the left-hand “Explorer” side pane. Call the file 📄app.py.
Make sure the file 📄app.py is located at the top-level folder like so (i.e., outside the 📁venv/ folder):
┬ webapp/
├── venv/
└── app.py                   <-- The file you just created
Type in this Python code:
from flask import Flask

app = Flask(__name__)

@app.route('/')
def index():
    return 'Hello, World!'
Note the mandatory indentation on the
returnline!
If autosave has not been turned on, save the file changes with Ctrl+S / ⌘+S.
Click into the lower pane with the opened terminal, and type in:
flask run
The Flask built-in development web server should spin up. Hold down the Ctrl / ⌘ key and 🖱️left-click on the URL 127.0.0.1:5000. Your standard browser will open at that URL, and you should be greeted with a Hello, World! message.
Copyright © 2026 Prof. Dr. Alexander Eck. All rights reserved.